Showing posts with label Big Shot. Show all posts

Monday, 12 August 2013

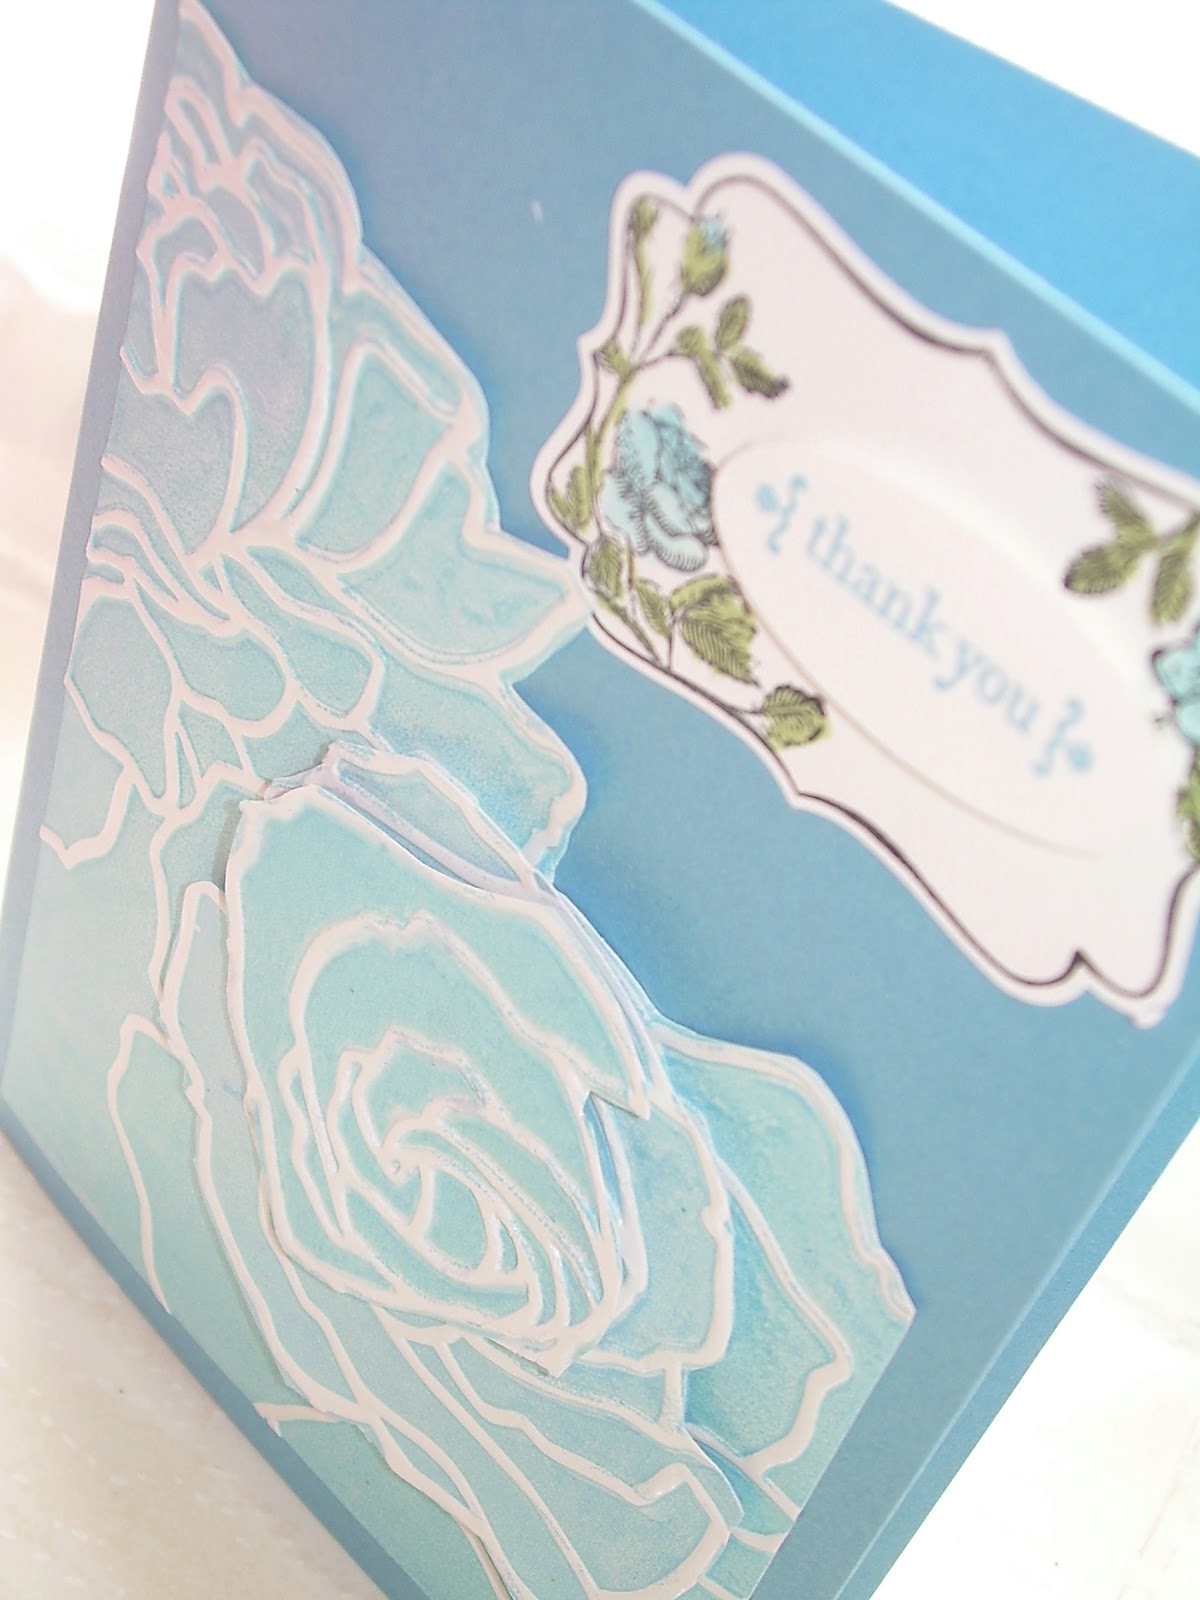
VIDEO Vellum Embossed Flowers

Hello Everyone

Today's video features the new Pansy Punch and matching Flower Shop stamps, which come as a bundle from Stampin' Up! We do lots of bundles now, enabling you to save money when you buy goodies that are designed to work together. We like that! :)


I hope you enjoyed today's video - back on Friday with more ideas. 


Love Elizabeth X

Thursday, 6 June 2013

Dressing up for a Wedding

Hello Everyone

Today's project is a Dress Up die wedding card. I stamped the bodice with the Gossamer Lace stamp - see how on my previous video!

The skirt is made with 9 Vanilla Flower Trim flowers and the greeting comes from Petite Pairs.


The Oval dies are in our Spring/Summer Stampin' Up! catalogue. I stamped the Crumb Cake background with a stamp from Creative Elements.

Hope you like it and I am back with two super-fun projects on Sunday.

Love Elizabeth X

Saturday, 25 May 2013

Dress Up Starts Here.....

Hello Everyone

Have you see the Dress Up dies in the Spring/Summer catalogue from Stampin' Up! Since I bought mine a few weeks ago they have lived on my craft desk! I just love all the things you can do with these dies.

I have a couple of videos to share with you over the next two weeks and lots and lots of different samples. Here are a few just for a starter....I told you I had made a lot! LOL


Here are a few close ups so you can see the embellishments and techniques I have used...

Below you can see ribbon and a brad on the Red Glimmer paper dress, a Vanilla Flower trim with a Large Pearl, small Basic Peals and Victoria Crochet ribbon on the DSP dress and on the final dress layered ribbon and an In-Color Dahlia.


Below I cut down the dress with a punch and the scallop edge of one of the dress dies to create an apron. The one on the right has the bodice stamped with a stamp from the Artistic Etchings stamp set and the skirt is cut with the Scallop Circle die.


The dress on the left below was first cut in Whisper White, then embossed using the Vintage Wallpaper die, them rubbed over with Frost White Shimmer Paint. I finished with a piece of Silver Glimmer paper to extend the length of the dress. On the right I used ribbon and Bakers Twine to create a bow to go on the jacket. I have a video showing another type of jacket made with this die coming up on Tuesday. 


As I said - this is just the start - keep visiting for more ideas and techniques!

Love Elizabeth X

Tuesday, 24 April 2012

Fabric Covered Pillow Box

Hello Everyone

Today's project is a pretty fabric covered pillow box. We made similar ones in class this month and in all the different fabrics they looked just gorgeous.

They were very simple to make using the Multipurpose Adhesive Sheets from Stampin' Up! All we did was to stick one side of the adhesive sheet to a square of cardstock, then laid the fabric on to the other side of the adhesive sheet.

We then ran all three layers through the Big Shot using the Pillow Box die - so easy!

This particular one was decorated using the Flower Burst Embosslit. I ran it through the Big Shot twice, once in Whisper White and once in Wisteria Wonder. I cut out the central portion of the Wisteria flower and daubed around the edges of both with matching Wisteria Wonder ink.


I finished with white Organza ribbon, three Basic Pearls and the 'friends' sentiment from Tiny Tags. I hope you like it.

Love Elizabeth X

Friday, 20 April 2012

Brayered Embossed Technique

Hello Everyone

The cards for today both use a brayered dry embossed technique. To create these cards, I first brayered the inside of the Manhatten Flower Embossing Folder with a bold ink - Melon Mambo for the first card. I took a piece of Glossy White cardstock and after running it through the Big Shot, I wiped any excess ink from the embossed portion of the card.

I then cut out the flowers, (I did an extra one and created some further dimension too). This card is finished with the beautiful white Organza Ribbon.


For this second card I used Marina Mist as the colour to brayer. I made the rose using three layers of the Manhatten Flower image and the greeting is from the Four Frames stamp set, punched with the matching Decorative Label punch.


Why not have a go with this simple but effective technique.

Love Elizabeth X

Saturday, 3 December 2011

Sparkly in December

Hello Everyone

Here we are in December - where did the year go? I turned around and it had gone! LOL

Now if you are in the UK and anyone asks you what you want for Christmas - why not have a Stampin' Up! gift voucher so you can buy crafting goodies from your wish list? I am offering vouchers which can be ordered by email or phone. Do contact me if you would like further details.

Today I have a sparkly Christmas card to share. It uses one of my favourite new stamp sets - Polar Party! Now I don't usually do cutesy - but I LOVE these little penguins and Polar Bears! Sweeeet!


We did all the circles of Whisper White with the Circles #2 die, plus one punched with the 1 3/4" Circle punch. The images were stamped in Stazon and then coloured using markers.

The greeting is from Petite Pairs stamped in Pacific Point to match the cardstock.

We finished by putting Versamark ink over the Polar Bear circle, we covered it in Heat and Stick powder and heated, then sprinkled on Dazzling Diamonds, (the best glitter ever IMO), to get a fabby sparkly look.

Hope you like it :)

Love Elizabeth X

Wednesday, 30 November 2011

Top Note Gift Card Holder

Hello Everyone

Today I am sharing another of the projects we made during our November classes. This idea originally came from my lovely upline Amanda, and I changed the stamps and papers to come up with this idea.

The nice thing about this design, is that it is a card and gift card holder in one.

We made it using the new zingy Lucky Limeade cardstock and co-ordinating Designer Paper and the stamps are from Tags till Christmas and Oval All.


I managed to take some scissors to my reel of fabby Cherry Cobbler Scallop Dots ribbon - isn't it pretty?


Love Elizabeth X

Sunday, 6 November 2011

Fabulous Fabric

Hello Everyone

When I saw the new Stampin' Up! catalogue for the first time, I was excited, but a little nervous so see we were getting the beautiful co-ordinating fabric choices. "Oh no - am I going to have to sew?" LOL

Well for those of you talented ladies who know one end of a sewing machine from the other - you will love this fabby fabric - but for those like me - you can STILL play with fabric and be happy with what you have made.

Now as I said, the best thing that Stampin' Up! offer is co-ordination between projects. So I started by using the beautiful Timeless Portrait Designer Series Paper to embellish a box...


Inside the box, is a matching brooch, made with the matching Timeless Portrait fabric. I cut it using the Fun Flowers die and the Big Shot - love it!


I think this would make a sweet gift - in fact I did make one for one of my lovely customers and good friend  Tracey. Now if you look at page 7 of the UK Stampin' Up! catalogue - you can see a picture of Tracey, being quoted about how much fun it is to host a workshop. We were both so excited to see her in there!


Back soon with more lovely new catty projects.

Love Elizabeth X

Thursday, 3 November 2011

Flower Tower

Hello Everyone

Today I am sharing yet another flower project from my launch party display. This one features flowers made using the Flower Daisy #2 and Fun Flowers Big Shot dies as well as with a whole pile of punches.


Here are a few close ups...in this one the flower on the right is made with layered circle punches popped up with dimensionals. Then I used the Itty Bitty flower punch and made all the little flowers and attached them - fiddly to make, but pretty!


I was pleased with the scrunched yellow dasies...


The wild rose is made with the Fancy Flower punch, daubed around the edge with Pink Pirouette and Rose Red ink.


Hope you like my flower tower :)

Love Elizabeth X

Saturday, 15 October 2011

In Color Fun Flowers

Hello Everyone

Something I made LOTS of for my launch party were flowers. I had so much fun making them using the Big Shot dies and punches


These flower pots of In Color flowers were made exclusively using the Fun Flowers die. This die makes large, stunning flowers which you can layer up. The leaves were cut with the Leaves #2 die.


You can see in the close up below, some layers were stamped using the Dot,Dot,Dot and Fine Flourish stamps. Some were embossed using the Big Shot Perfect Polka Dots embossing folder. I then daubed around the flowers using the matching inks - Calypso Coral, Island Indigo, Pool Party & Wisteria Wonder - the leaves are done in the final In Color - Lucky Limeade.


Love Elizabeth X

Friday, 23 September 2011

Stationery Box Class Close Ups

Hello Everyone

Last month I ran a fun evening class where we made a stationery box and some luxury cards and tags. I though I would show some close up pictures of what we created today. You may notice the Big Shot came in very handy with making these projects. We used the Just Believe stamp set and the fabulous Cherry Cobbler ink throughout.


The first group features the Top Note die and Beautiful Wings Embosslits die...


The next set used the Scallop Circle die and the Ornament Punch to create the vase...


The third set features the Scallop Envelope die and the Large Heart and Heart to Heart punch...


The stationery box itself was co-ordinated with a stamp envelope and matching pen...


We had a great time making these goodies - I hope you like them too!

Sunday, 11 September 2011

Glass Glitter Butterfly

Hello Everyone

When I saw the new Glass Glitter in the mini catalogue, I was intrigued to try it. I had a few experiments with a range of adhesives to see what worked best and found the easiest was sticky strip.

To make this card, I first stamped the background using two butterfly images. One is the single stamp called All a Flutter and the one with closed wings is from Nature Walk. I wanted to focus to be on the 'bling butterfly', so I used black stazon ink for a monochrome background.


Next I covered a small rectangle of of cardstock with sticky strip, (note: we don't have the adhesive sheets in the UK, or I would have used them!) I then cut the butterfly with the Beautiful Butterflies die, before removing the sticky strip backing.

I always keep my glitter in tupperware type boxes, so I was able to press the butterfly firmly down into the glitter and then shake off the excess.

I made his body with a piece of 1/4" black taffeta ribbon, snipped at the top to create antenae, which I topped with rhinestones. How blingy is that butterfly? LOL

Now in the catalogue it says that these glitters, (they come in 3 colour choices), are designed to tarnish over time to give an a vintage look. Well I made my first projects with it about 3 months ago - and no tarnishing has taken place yet! :) So if any of you U.S./Canadian or Aussie demos can tell me how long we wait for tarnishing to occur - I would be delighted to know! LOL

Thursday, 8 September 2011

Owls About It!

Hello Everyone

Today I am sharing a little Owl card. I love the Owl punch - it makes such great projects.

The card base is Chocolate Chip with a Scallop Circle die cut piece of Woodland Walk designer series paper.


The circles were cut with the Circles #2 die and the sentiment comes from Curvy Verses. The flowers were stamped using Itty Bitty Bits and Punch Potpourri.

Hope you like it!

Monday, 29 August 2011

Something for the boys

Hello Everyone

Today I am sharing a project I taught in classes a while away. The idea came from two Stampin' Up! training events. At one we learned how to make a wallet from the Top Note die, at the other we learned the Mock Croc technique - so I put them together to make this cool project for the man in your life.

If you have never done 'Mock Croc' - get your local SU! demo to show you how. It is great for little purses and handbags and shoes on cards.

We made this with Early Espresso cardstock.


When you open up you can create a little pocket for money or a gift card - couldn't find a gift card for the photo - so you have my gym membership card instead! LOL


I hope you like it! :)

Saturday, 20 August 2011

Two Ways with the Scallop Envelope Die

Hello Everyone

Have you used the Scallop Envelope Die yet? It makes really cute envelopes which are ideal for tags or for using as embellishments on your cards. But that is just the start. Here are a couple of little boxes I have made using this die.

Firstly, we made these cute Gift Card Holders at a class.


We finished them with Springtime Vintage designer series paper and the scrummy Seam Binding ribbon. The tags were done with Tiny Tags stamps.

My second use of this die is the little basket which I fell in love with when I saw it done at regional training. You need four envelopes to make it...


Isn't it cute? I did the handle with cardstock cut with the Scallop Trim Border and trimmed with the yummy Rich Razzleberry satin ribbon.

Thursday, 4 August 2011

Springtime Vintage in Summertime

Hello Everyone

Today I thougth I would share two little projects made with the beautiful Springtime Vintage designer series paper from Stampin' Up!

The first is a little bag I made at team training and then finished later with a few little embellishments.


I created a closure using the fabby Pear Pizzazz seam binding ribbon. I then stamped up a little 'hand crafted' tag using Tiny Tags stamps and finished with three faux brads in Wild Wasabi & Marina Mist.

My second project is a cute little box made using the scallop circle die to create the embellishment. You need two scallop circles, snipped from one scallop valley into the centre and then folded accordian style. You glue the two sides together and top with a punched scallop circle, layered up with a circle of designer paper and a pretty brad.


For the back of the bag I used the Little Leaves die and Flower Dasies #2 die.


I just love those Springtime Vintage papers - I want Spring to last all year!

Saturday, 23 July 2011

Quick Daisy Card

Hello Everyone

Just a quick post and a quick card today, made with the Daisies #2 die and some buttons.  The background is a piece of the beautiful Elegant Soiree paper. I layered up the middle of the flowers with punched circles and buttons - that big one is from one of the sets in the mini catalogue - they are SO big you can thread 1/4" ribbon through them as I have here.


I finished with the greeting stamped with Curly Cute and the little cake from Itty Bitty Bits.

Back soon with more projects.

Wednesday, 20 July 2011

Welcome Wreath

Hello Everyone

Today I am sharing a Welcome wreath that I made using the Fun Flowers die and my Big Shot. I have shown this before, but I have had a couple of questions about how it was made - so today I will share!

I purchased an inexpensive flat wire frame and with the Big Shot the wreath was very quick to put together.

First I cut 6 sets of flowers in Rose Red, then 6 in Pretty in Pink cardstock. This is so easy - the Big Shot will cut up to 8 sheets of cardstock at once! Then I used a dauber and daubed ink around the edge of each flower to add dimension.

I curled the petals lightly with a bone folder and layered them up, attaching them with a brad. I made a 12" backing for the frame by drawing around some scrap card and attached the flowers with dimensionals.

I felt the wreath needed some greenery, so I cut leaves with the Little Leaves die. Next I pulled out my French Foliage stamp set and stamped some of the leaves onto Wild Wasabi paper in Garden Green ink. I cut them out and then glued them and the Little Leaves in around the flowers. Here is a close up...


I finished the wreath by stamping my 'Welcome' sentiment using the Broadsheet Alphabet and added some Basic Rhinestones on this and on a few of the flowers.

Now - pretty in a different way - I am going to show you such a cheap decoration - almost free! As a demonstrator, all my goodies from Stampin' Up! arrive carefully packed in brown packing paper. I have reams of the stuff and am always looking for interesting ways to recyle it. This is what I did with the paper from my last order...

I made over 60 paper flowers - with this paper my Big Shot easily cut 12 layers at a time, so I had them done in a trice! I attached them with little eyelets using my crop a dile and now they are all ready to decorate my table at my next event. What a bargain!

Sunday, 17 July 2011

Embedded Foliage

Hello Everyone

As promised, I am back with another embedded embossed card. (For more on this technique, scroll down to my previous post).

Here I am using my favourite stamp set from the Stampin' Up! mini catalogue - French Foliage.


I stamped the text and 'blobs' on first, then stamped the leaves on a separate sheet before embossing them into the background.

The cardstock is Riding Hood Red, which really sets off the Autumnal colours.

Hope you like :)

Monday, 11 July 2011

Want to come to a class?

Hello Everyone

By special customer request I have come up with a Just Believe Stationery Box class, which I will be teaching in a local hall on Thursday 18th August.

This project comprises six luxury square cards, six matching envelopes, six tags, a stamps envelope, a matching pen and the stationery box itself. Wouldn't this set make a great gift?


The cost for this class is £25.00 and includes a pot of Tombow glue or £22 if you are one of my regular class ladies.

Now this class is filling up FAST - so let me know ASAP if you would like to join us for this 3 hour evening class.

Hope you can make it! :)