Hello Everyone
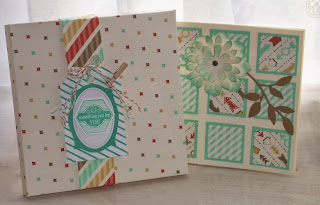
Today I am sharing a project I taught at my May classes. It was very popular with my lovely ladies and indeed was my favourite project of the year so far.
We took plain MDF hearts, covered them with Very Vanilla cardstock and stamped using the Happy Watercolour stamp set.
We made flowers using the Spiral Flower Die and daubed both them and the heart with Soft Suede ink the create a vintage effect. We used the soon-to-be-gone Little Leaves die and finished the heart with Gold Bakers Twine and Crochet Trim, (a bit hidden in the photo).
I hope you like this project.
Back tomorrow with a blog hop featuring projects from our NEW CATALOGUE LAUNCH!!! WOO HOO!!!
Love Elizabeth X
Showing posts with label Little Leaves die. Show all posts
Showing posts with label Little Leaves die. Show all posts
Thursday, 26 June 2014
Saturday, 29 March 2014
Blossom Party Card - as promised!
Hello Everyone
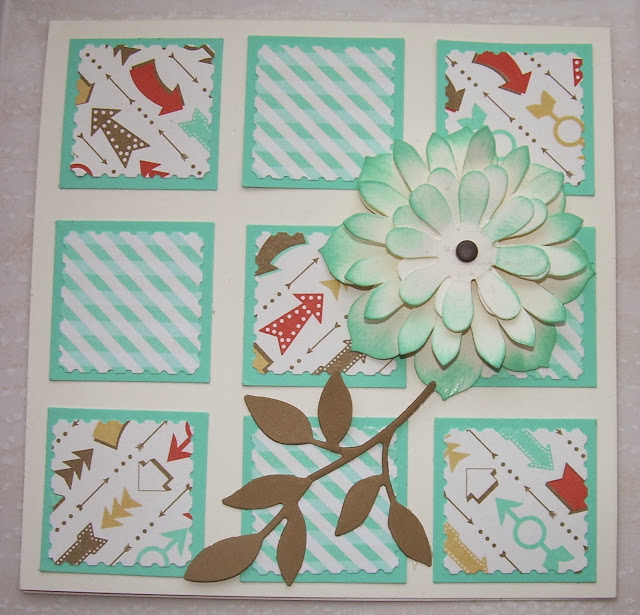
I promised you a closer look at the card which prompted me to make a box to put it in! See my video from Tuesday to see how that went.
The card itself is made with the Naturals White cardstock and the DSP layers are cut with the Postage Stamp Punch. I used a retired 1 3/8" punch to cut the Calypso Coral square layers.
The flower is made with the Blossom Party Die - but this design would work really well with the new Spiral Flower Die that is in the Spring/Summer catalogue. I will be trying that soon.
The leaf is another die - the Little Leaves die - but you could also use the leaves from the Bird Punch if you have that one.
Hope you enjoyed a closer look at that card. Back on Tuesday with another video.
Love Elizabeth X
Wednesday, 28 December 2011
Birthday Owl
Hello Everyone
Today I am sharing a cute birthday card that we made during our December classes. We used a top note background and the Owl punch to make the sweet birthday owl.
The stamps come from Party this Way and Funky Four - the wings of the owl are made using the Boho Blossoms punch and the leaves made using the Little Leaves die.
I did the eyes in advance because I wanted to use Crystal Effects and it takes a little while to dry when you use a blob to make the 3D eyes. Now we have the Multipurpose adhesive sheets, I could make them all up on the adhesive sheet, so they could easily be stuck on during the class.
This card was inspired by the one I made for my niece Phoebe on her second birthday, so I though I would show you her card too....
Hope you like my cute little owl cards :)
Love Elizabeth X
Wednesday, 20 July 2011
Welcome Wreath
Hello Everyone
Today I am sharing a Welcome wreath that I made using the Fun Flowers die and my Big Shot. I have shown this before, but I have had a couple of questions about how it was made - so today I will share!
I purchased an inexpensive flat wire frame and with the Big Shot the wreath was very quick to put together.
First I cut 6 sets of flowers in Rose Red, then 6 in Pretty in Pink cardstock. This is so easy - the Big Shot will cut up to 8 sheets of cardstock at once! Then I used a dauber and daubed ink around the edge of each flower to add dimension.
I curled the petals lightly with a bone folder and layered them up, attaching them with a brad. I made a 12" backing for the frame by drawing around some scrap card and attached the flowers with dimensionals.
I felt the wreath needed some greenery, so I cut leaves with the Little Leaves die. Next I pulled out my French Foliage stamp set and stamped some of the leaves onto Wild Wasabi paper in Garden Green ink. I cut them out and then glued them and the Little Leaves in around the flowers. Here is a close up...
I finished the wreath by stamping my 'Welcome' sentiment using the Broadsheet Alphabet and added some Basic Rhinestones on this and on a few of the flowers.
Now - pretty in a different way - I am going to show you such a cheap decoration - almost free! As a demonstrator, all my goodies from Stampin' Up! arrive carefully packed in brown packing paper. I have reams of the stuff and am always looking for interesting ways to recyle it. This is what I did with the paper from my last order...
I made over 60 paper flowers - with this paper my Big Shot easily cut 12 layers at a time, so I had them done in a trice! I attached them with little eyelets using my crop a dile and now they are all ready to decorate my table at my next event. What a bargain!
Friday, 1 July 2011
Owl Punch Ideas
Hello Everyone
Do you love that little Owl punch? I have been making all sorts of critters and other things with the Owl punch - it is so much fun to use. I did all my lovely ladies a handout recently showing lots of owl ideas. Not many of these are my original ideas - there have been many talented people out there thinking up owl projects before me...but I take credit for the robin! :)
Here is one of the owl cards I have made...
I did the eyes with Crystal Effects. My non-crafty friends all shook this card because they thought they were goggle eyes! LOL
Subscribe to:
Posts (Atom)


