Hello Everyone
I always try to put all my class cards on my blog, but whoops, this one got missed! We actually did it at class almost a year ago. What is clever about this card is seeing how it pops out of the flower pot....
We stamped the flowers with Mixed Buch and punched out with the matching Blossom Punch. The leaves were stamped using the French Foliage stamp set and the greetings come from Petite Pairs.
Hope it was worth the wait.
Love Elizabeth X
Showing posts with label French Foliage. Show all posts
Thursday, 25 April 2013
Tuesday, 22 May 2012
Blossom Punch Flower
Hello Everyone
As promised something else from the new Summer Mini Catalogue from Stampin' Up! This card features our newest punch the Blossom Punch. Now even if, like me, you think you don't need another flower punch - I bet you change your mind as you start to try it. It certainly won me over. Of course Stampin' Up! do offer a matching stamp set, but here I have just used the Greenhouse Garden stamp and doesn't it work well? I finished the flower with a few little Basic Pearls.
The leaves were stamped with the French Foliage stamp set using the rock n roll technique. Love it!
Love Elizabeth X
As promised something else from the new Summer Mini Catalogue from Stampin' Up! This card features our newest punch the Blossom Punch. Now even if, like me, you think you don't need another flower punch - I bet you change your mind as you start to try it. It certainly won me over. Of course Stampin' Up! do offer a matching stamp set, but here I have just used the Greenhouse Garden stamp and doesn't it work well? I finished the flower with a few little Basic Pearls.
The leaves were stamped with the French Foliage stamp set using the rock n roll technique. Love it!
Love Elizabeth X
Saturday, 19 May 2012
Keep it Simple
Hello Everyone
As you may have seen on a previous post, I went a bit complex with our 3D class project this month (LOL), so I had to keep it fairly simple for our other two cards.
The first one features the Everything Eleanor stamp set...simple but effective. The greeting is from Curly Cute.
Our technique card was also a simple one, using white craft ink to get a 3D effect. The stamp set used is one of my favourites, French Foliage...
Once again a quick and easy card that still has a great impact....and my ladies didn't have to stay all night to finish! LOL
More from the Spring Mini Catalogue coming up soon...
Love Elizabeth X
As you may have seen on a previous post, I went a bit complex with our 3D class project this month (LOL), so I had to keep it fairly simple for our other two cards.
The first one features the Everything Eleanor stamp set...simple but effective. The greeting is from Curly Cute.
Our technique card was also a simple one, using white craft ink to get a 3D effect. The stamp set used is one of my favourites, French Foliage...
Once again a quick and easy card that still has a great impact....and my ladies didn't have to stay all night to finish! LOL
More from the Spring Mini Catalogue coming up soon...
Love Elizabeth X
Wednesday, 19 October 2011
Ribbon Lace Punch Ideas.
Hello Everyone
Now I have already said that I LOVE the Ribbon Lace Punch - there is so much you can do with it. Over the next couple of posts, I will give you just a few of those ideas
With this first card, done in Calypso Coral, we start with the standard use - it punches this great lace effect in cardstock and designer paper. Here I used Chocolate Chip, Very Vanilla & Sahara Sand to create a background. The stamp set is French Foliage - SO glad this set made it in to the new catalogue - I LOVE it! The 'thank U' sentiment comes from Pennant Parade - one of new stamp sets.
So that is the basic idea... now for more that you can do with this punch...
You can run either ribbon or contrasting cardstock behind the border, as I have done in the card below. It gives a completely different look. You can use a strip as I have, or punch circles in different colours and so get a different colour behind each flower.
I finished this card with the fabby Something For Christmas stamp and some rhinestones in the centres of each flower.
Love Elizabeth X
Now I have already said that I LOVE the Ribbon Lace Punch - there is so much you can do with it. Over the next couple of posts, I will give you just a few of those ideas
With this first card, done in Calypso Coral, we start with the standard use - it punches this great lace effect in cardstock and designer paper. Here I used Chocolate Chip, Very Vanilla & Sahara Sand to create a background. The stamp set is French Foliage - SO glad this set made it in to the new catalogue - I LOVE it! The 'thank U' sentiment comes from Pennant Parade - one of new stamp sets.
So that is the basic idea... now for more that you can do with this punch...
You can run either ribbon or contrasting cardstock behind the border, as I have done in the card below. It gives a completely different look. You can use a strip as I have, or punch circles in different colours and so get a different colour behind each flower.
I finished this card with the fabby Something For Christmas stamp and some rhinestones in the centres of each flower.
Love Elizabeth X
Tuesday, 16 August 2011
Scallop Circle Card
Hello Everyone
This is a card I have been doing at some of my recent events and also shared with my fellow demos in Amanda's team at July team training.
It uses the Big Shot as you can probably see. I cut the card base using the Scallop Circle die, the the flower was done with the Manhattan Rose embossing folder. I cut the flower out, which is easy as you can follow the embossed edge, and then gently coloured it with Rich Razzleberry ink using a dauber.
The leaves are from French Foliage, which I still love SO much. I attached the flower using dimensionals so it popped up above the leaves.
The sentiment is stamped on Very Vanilla cardstock and punched out using the Modern Label punch. The layer beneath is created using another die - one of those from the Lots of Tags pack which are great for layering with your punches.
Hope you like it!
This is a card I have been doing at some of my recent events and also shared with my fellow demos in Amanda's team at July team training.
It uses the Big Shot as you can probably see. I cut the card base using the Scallop Circle die, the the flower was done with the Manhattan Rose embossing folder. I cut the flower out, which is easy as you can follow the embossed edge, and then gently coloured it with Rich Razzleberry ink using a dauber.
The leaves are from French Foliage, which I still love SO much. I attached the flower using dimensionals so it popped up above the leaves.
The sentiment is stamped on Very Vanilla cardstock and punched out using the Modern Label punch. The layer beneath is created using another die - one of those from the Lots of Tags pack which are great for layering with your punches.
Hope you like it!
Wednesday, 20 July 2011
Welcome Wreath
Hello Everyone
Today I am sharing a Welcome wreath that I made using the Fun Flowers die and my Big Shot. I have shown this before, but I have had a couple of questions about how it was made - so today I will share!
I purchased an inexpensive flat wire frame and with the Big Shot the wreath was very quick to put together.
First I cut 6 sets of flowers in Rose Red, then 6 in Pretty in Pink cardstock. This is so easy - the Big Shot will cut up to 8 sheets of cardstock at once! Then I used a dauber and daubed ink around the edge of each flower to add dimension.
I curled the petals lightly with a bone folder and layered them up, attaching them with a brad. I made a 12" backing for the frame by drawing around some scrap card and attached the flowers with dimensionals.
Today I am sharing a Welcome wreath that I made using the Fun Flowers die and my Big Shot. I have shown this before, but I have had a couple of questions about how it was made - so today I will share!
I purchased an inexpensive flat wire frame and with the Big Shot the wreath was very quick to put together.
First I cut 6 sets of flowers in Rose Red, then 6 in Pretty in Pink cardstock. This is so easy - the Big Shot will cut up to 8 sheets of cardstock at once! Then I used a dauber and daubed ink around the edge of each flower to add dimension.
I curled the petals lightly with a bone folder and layered them up, attaching them with a brad. I made a 12" backing for the frame by drawing around some scrap card and attached the flowers with dimensionals.
I felt the wreath needed some greenery, so I cut leaves with the Little Leaves die. Next I pulled out my French Foliage stamp set and stamped some of the leaves onto Wild Wasabi paper in Garden Green ink. I cut them out and then glued them and the Little Leaves in around the flowers. Here is a close up...
I finished the wreath by stamping my 'Welcome' sentiment using the Broadsheet Alphabet and added some Basic Rhinestones on this and on a few of the flowers.
Now - pretty in a different way - I am going to show you such a cheap decoration - almost free! As a demonstrator, all my goodies from Stampin' Up! arrive carefully packed in brown packing paper. I have reams of the stuff and am always looking for interesting ways to recyle it. This is what I did with the paper from my last order...
I made over 60 paper flowers - with this paper my Big Shot easily cut 12 layers at a time, so I had them done in a trice! I attached them with little eyelets using my crop a dile and now they are all ready to decorate my table at my next event. What a bargain!
Sunday, 17 July 2011
Embedded Foliage
Hello Everyone
As promised, I am back with another embedded embossed card. (For more on this technique, scroll down to my previous post).
Here I am using my favourite stamp set from the Stampin' Up! mini catalogue - French Foliage.
I stamped the text and 'blobs' on first, then stamped the leaves on a separate sheet before embossing them into the background.
The cardstock is Riding Hood Red, which really sets off the Autumnal colours.
Hope you like :)
As promised, I am back with another embedded embossed card. (For more on this technique, scroll down to my previous post).
Here I am using my favourite stamp set from the Stampin' Up! mini catalogue - French Foliage.
I stamped the text and 'blobs' on first, then stamped the leaves on a separate sheet before embossing them into the background.
The cardstock is Riding Hood Red, which really sets off the Autumnal colours.
Hope you like :)
Thursday, 16 June 2011
Concord Crush Trio
Hello Everyone
Another three sample cards from me today - this time all based on the yummy Concord Crush cardstock and ink...
All these cards feature stamp sets from the Stampin' Up! Mini Catalogue - which you can see in full by clicking the link at the top of this blog.
The first one is the stamp set I fell in love with as soon as I saw it. It is called Nature Walk and has a feel of botanical drawings...
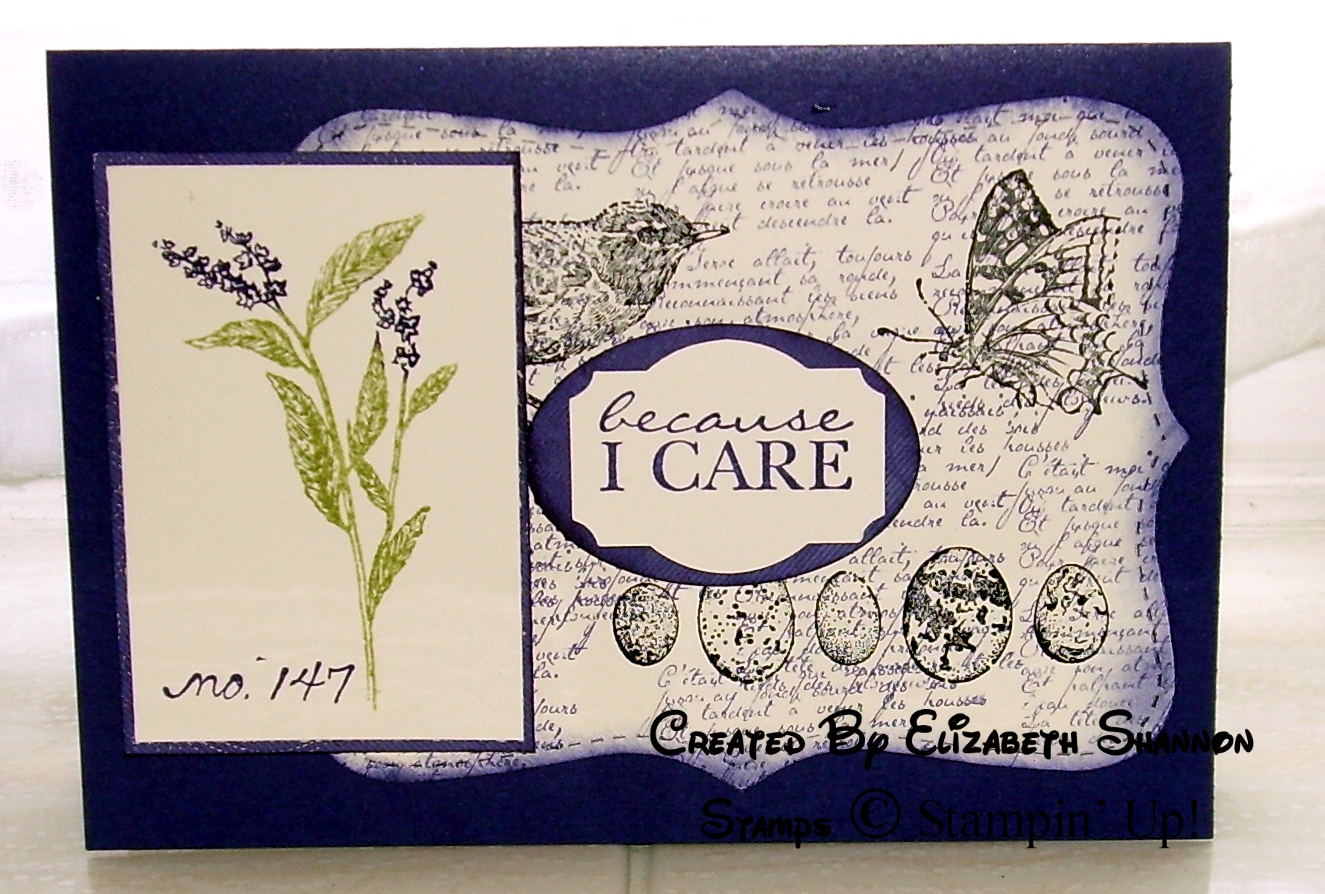
I started by cutting a Whisper White top note shape with my trusty Big Shot stamped all over using the script stamp from French Foliage, (more of that set coming up). I stamped the eggs, bird and butterfly images in Basic Grey ink and used the marker to stamp technique to stamp the flower.
This card started with the frame from the Notably Ornate stamp set. The topper is done with the frame from Four Frames, which matches the Decorative Label punch. The three little images are from Itty Bitty Bits, which also go with a trio of matching punches.
Now for my favourite stamp set from the Mini Catalogue - French Foliage. You know I almost didn't buy this set - it was springtime and it seemed such an autumn set - but I am SO glad I ended up getting it. It is the most forgiving set I have ever stamped with - you just stamp and everything looks fabby! And it works in every colour too - which you wouldn't imagine.
I used a little Newprint DSP and cut it with the Top Note die. I also cut several circles with the Circle #2 die.
I then used the back of the smaller circle in each case to create a mask and daubed to make a frame. Then I stamped to my hearts content with those lovely French Foliage images.
Hope you like my trio of cards - which is your favourite?
Another three sample cards from me today - this time all based on the yummy Concord Crush cardstock and ink...
All these cards feature stamp sets from the Stampin' Up! Mini Catalogue - which you can see in full by clicking the link at the top of this blog.
The first one is the stamp set I fell in love with as soon as I saw it. It is called Nature Walk and has a feel of botanical drawings...
I started by cutting a Whisper White top note shape with my trusty Big Shot stamped all over using the script stamp from French Foliage, (more of that set coming up). I stamped the eggs, bird and butterfly images in Basic Grey ink and used the marker to stamp technique to stamp the flower.
This card started with the frame from the Notably Ornate stamp set. The topper is done with the frame from Four Frames, which matches the Decorative Label punch. The three little images are from Itty Bitty Bits, which also go with a trio of matching punches.
Now for my favourite stamp set from the Mini Catalogue - French Foliage. You know I almost didn't buy this set - it was springtime and it seemed such an autumn set - but I am SO glad I ended up getting it. It is the most forgiving set I have ever stamped with - you just stamp and everything looks fabby! And it works in every colour too - which you wouldn't imagine.
I used a little Newprint DSP and cut it with the Top Note die. I also cut several circles with the Circle #2 die.
I then used the back of the smaller circle in each case to create a mask and daubed to make a frame. Then I stamped to my hearts content with those lovely French Foliage images.
Hope you like my trio of cards - which is your favourite?
Monday, 18 April 2011
French Foliage Mosaic
Hello Everyone
Well I had a card planned for my technique class this month which featured a very pretty hostess set called Because I Care. I did have these cards on display during my class and will put them at the end of this post - but having received French Foliage, I couldn't resist a re-design!
I just ADORE this stamp set - you can't go wrong with it! First we stamped some random images on a rectangle of whisper white cardstock, then used the 11/4" square punch to punch out six squares. We then created a mosaic with the images, (some did them in the order they were stamped in as above, some were laid out at random, as below).
The background is Crumb Cake card stock stamped with the Very Vintage wheel to create a subtle effect.
We finished with the oh-so-cute buttons, created with the Big Shot machine and Sweet Buttons Embosslits die. That machine makes such great embellishments - we simply cut and daubed them with Crumb Cake ink and drew in the thread with an Early Espresso marker.
OK here are the original designs... Baja Breeze and River Rock
And a monochrome option...
Well I had a card planned for my technique class this month which featured a very pretty hostess set called Because I Care. I did have these cards on display during my class and will put them at the end of this post - but having received French Foliage, I couldn't resist a re-design!
I just ADORE this stamp set - you can't go wrong with it! First we stamped some random images on a rectangle of whisper white cardstock, then used the 11/4" square punch to punch out six squares. We then created a mosaic with the images, (some did them in the order they were stamped in as above, some were laid out at random, as below).
The background is Crumb Cake card stock stamped with the Very Vintage wheel to create a subtle effect.
We finished with the oh-so-cute buttons, created with the Big Shot machine and Sweet Buttons Embosslits die. That machine makes such great embellishments - we simply cut and daubed them with Crumb Cake ink and drew in the thread with an Early Espresso marker.
OK here are the original designs... Baja Breeze and River Rock
And a monochrome option...
I do like the Because I Care ones - but my favourite has got to be French Foliage - so what do you think?
Saturday, 9 April 2011
Family Creations
Hello Everyone
Today I sharing two little projects I made for my family members recently.
First my sister had her birthday a couple of weeks ago. Maria and I are buying each other a sisters' day out later in the year for our birthdays, (we are going to a show, cream tea and a fabby dinner), but I wanted to give her a little something to open on her special day.
I bought her a little pot of eyeshadow and made a pretty little gift box for it using the Big Shot machine and a Mini Milk Carton die.
It is closed with a paperclip with a little narrow taffeta ribbon in Marina Mist to match the ink I used. Did you notice the French Foliage stamps in evidence again? I am loving that set so much.
I finished the box with the M from Broadsheet Alphabet and a rhinestone for a bit of birthday bling!
My next card features another stamp set I really love - Just Believe. I made this as a Mothers' Day card, (for my US visitors, Mother's day is earlier in the UK).
I had a play with my Colour Spritzer Tool to get the speckled effect on the Sahara Sand card. The flower is stamped in White Craft Ink and I finished the card with a button threaded with Linen Thread.
Inside I used a top note insert, the butterfly comes from Nature Walk, (another lovely stamp set from the new Mini Catalogue) and the sentiment is from Occasional Greetings - a very useful set to own.
Back with some more projects soon.
Today I sharing two little projects I made for my family members recently.
First my sister had her birthday a couple of weeks ago. Maria and I are buying each other a sisters' day out later in the year for our birthdays, (we are going to a show, cream tea and a fabby dinner), but I wanted to give her a little something to open on her special day.
I bought her a little pot of eyeshadow and made a pretty little gift box for it using the Big Shot machine and a Mini Milk Carton die.
It is closed with a paperclip with a little narrow taffeta ribbon in Marina Mist to match the ink I used. Did you notice the French Foliage stamps in evidence again? I am loving that set so much.
I finished the box with the M from Broadsheet Alphabet and a rhinestone for a bit of birthday bling!
My next card features another stamp set I really love - Just Believe. I made this as a Mothers' Day card, (for my US visitors, Mother's day is earlier in the UK).
I had a play with my Colour Spritzer Tool to get the speckled effect on the Sahara Sand card. The flower is stamped in White Craft Ink and I finished the card with a button threaded with Linen Thread.
Inside I used a top note insert, the butterfly comes from Nature Walk, (another lovely stamp set from the new Mini Catalogue) and the sentiment is from Occasional Greetings - a very useful set to own.
Back with some more projects soon.
Sunday, 3 April 2011
Mini Pillow Boxes
Hello Everyone
So did you miss my last post? Well scroll down if you did and find out all about my new favourite toy, (or tool as I am calling it at home), the Big Shot!
It appeared in our new Mini Catalogue and I have been having a great time creating lots of different projects to share with you.
Now if you came to my Blue & Sparkley Christmas class last year, you will remember painstakingly cutting and scoring our card to create a pillow gift box - now we can make them in a flash with Pillow Box die.
The one above was a distressed effect using Newsprint designer paper and the Music Note wheel. Below I have used my favourite stamp set from the new Mini Catalogue - French Foliage. I love everything I have made with this stamp set - it is so easy to create a lovely collage effect and works in lots of different colour combinations.
Back soon with some more cute projects for you.
So did you miss my last post? Well scroll down if you did and find out all about my new favourite toy, (or tool as I am calling it at home), the Big Shot!
It appeared in our new Mini Catalogue and I have been having a great time creating lots of different projects to share with you.
Now if you came to my Blue & Sparkley Christmas class last year, you will remember painstakingly cutting and scoring our card to create a pillow gift box - now we can make them in a flash with Pillow Box die.
The one above was a distressed effect using Newsprint designer paper and the Music Note wheel. Below I have used my favourite stamp set from the new Mini Catalogue - French Foliage. I love everything I have made with this stamp set - it is so easy to create a lovely collage effect and works in lots of different colour combinations.
Back soon with some more cute projects for you.
Subscribe to:
Posts (Atom)