Thursday 30 December 2010

SaleABration Is Here!

Hello Everyone

For those who don't know, Stampin' Up! don't have a Sale - we have a SaleABration! It means that for every £45 ordered you get to choose a FREE stamp set.

It means that this is a GREAT time of year to host a workshop. If you are in the Southampton, Romsey, Winchester or New Forest area and would like the chance to have a Stampin' Up! party for your friends I would love to come and entertain you. And hostesses get the chance to get an extra SaleABration set too.

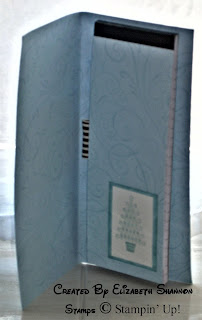
At my January workshops, I will be showing you how to make this cute gift card holder using the Sweet Summer stamp set, (and yes - it is one of the free ones you can recieve!)


Now it is quite cute on the outside - but wait till you see the inside...


The idea for this pleated bag came from a swap I received at convention. A VERY talented lady called Jackie Abdellaoui made the original - I just changed it up by designing a version with the beautiful SaleABration stamp set.

I hope you like it - and if you are nearby, why not book a workshop and see how it is made?

Have a great day. X


Monday 27 December 2010

A Vintage Birthday Card

Hello everyone

I hope you all had a GREAT Christmas.

Today I am going to share a birthday card I made for my DH Michael a couple of weeks ago. He has a December birthday, so it is a good time to take a break from making holiday cards and create something especially for him.


For those of you that don't know, Mike is a songwriter - so I decided to use my new Music Note wheel and some images from Artistic Etchings, Notably Ornate and a scrap of Newsprint DSP. Oh and the background image is the Medallion stamp. My desk was really messy by the time I was done.

Now I have been waiting to play with these toys - sorry I mean tools LOL. I was lucky enough to have my name called by the Prize Patrol at Stampin' Up! convention in November. I was given both Artistic Etchings and the DSP, neither of which I owned. It was so exciting to get freebies. :)

I used a colour theme of Cherry Cobbler, Early Espresso and Crumb Cake to create a vintage feel card. There was lots of use of the dauber and punches too. I used the Tiny Tags set too - see I keep remembering something else I used as I look at the picture!

Here is a close up.


I hope you like and I will be back really soon with a lovely SaleABration project.

Have a great day. 

Friday 24 December 2010

Happy Christmas Candles

Hello Everyone

My final Christmas project of the year - I can't believe Santa will be round so soon! Where did that year go?

Today I am sharing a stamped candle set that I made using Season of Joy, Contempo Christmas and Perfect Punches stamp sets.


If you have never made stamped candles before, it is easy to do. You stamp your image on tissue wrapping paper, cut out the images and place on the candle. Next to tightly hold them on to the candle using baking parchment. You then hold a heat gun over the image until the surface wax starts to melt - the tissue is then absorbed into the candle.

Watch out for your fingers - it is easy to burn them if you are not careful. All candles melt at different rates, so you will need to check as you go and re-heat if you can still see the tissue paper.

Wishing each and every one of you a very Merry Christmas and a Happy, Healthy New Year. X

Tuesday 21 December 2010

Did you make this card?

Hello Everyone

Today's card is a swap my upline Amanda received at a training session. I don't know who created it - but whoever it was she did a fabulous job. (If it is you  - let me know and I will give you proper credit).

It is made using the Delightful Decorations stamp set and I love it.


The colours are Early Espresso, Pretty in Pink and Pirouette Pink and I adore the way the dazzling diamonds is used all over the pink bauble.

Back on Christmas eve with one last festive project for this year.

Saturday 18 December 2010

Kimono Kids Card

Hello Everyone

I had a request to teach a card that I had in my samples book which featured three Christmas socks hanging on a line, but because I plan my classes quite far in advance, I was concerned it would be too late in the year to do a Christmas card.

So I decided to offer a choice this month - my class ladies could make the Christmas version, or a Thank You card - always useful after Christmas!

Today I am sharing that Thank You card and a similar one I made at the same time.

This is the class one.  I LOVE those little Kimono Kids - they remind me of the animated dolls in It's a Small World at Disney! (Now you are going to be singing that song all day - LOL) I kept it clean with the little girls stamped in Real Red with their hair done with a black marker and their Kimonos painted with an aqua painter.

The lantens are cut out and 'hung' from the silver elastic with dimensionals. The buttons have their thread drawn in with a white gel pen.

I did the sentiment using Curly Cute in clearmount - I love the way those sentiments look and they are so easy to place.

Here is version number two, done without the elastic.

This time I stamped the lanterns directly on to the cardstock in Stazon ink and then coloured the images using real red, cherry cobbler and bravo burgundy markers, and a white gel pen. Here is a close up:


Hope you like them - now all together "It's a small world after all......." LOL

Wednesday 15 December 2010

Glittery Razzleberry Card

Hello Everyone

Well after my 'boys' card, I thought I would share a really sparkly and cute Christmas card. This one uses the Ornament punch from Stampin' Up!


Now I made a similar card last year using a circle punch, but this is SO much better with the ornament shape. I punched the baubles out in whisper white cardstock and then stamped them using the snowflake image from Season of Joy, my all time favourite Christmas stamp set. I then daubed around the edge using matching Rich Razzleberry ink.

The background is stamped with the swirl and flower image from Season of Joy and the greeting comes from the same set - love the way they all work so well together.

I made two colours - but I think this card would look great in any colour.


I finished the cards with a twist of elastic cord to create the loops and after gently curling the baubles with a bone folder, I attached them to the card using dimensionals.

Can you see the dazzling diamons glitter I added around the snowflakes? It looks so sparkly in real life.

Hope you like them.

Thursday 9 December 2010

Grundgy Christmas

Hello Everyone

As a neat freak, I don't do messy - well apart from my craft room! I like quite clean projects so a grungy look is way out of my comfort zone - but I was playing with my crimper and came up with this card.


I gritted my teeth and tore my cardstock and dirtied it all up with lots of daubing in Always Artichoke and Crumb Cake ink.

I used a border of orange to add some zing - and I think I quite like it. I guess it could be a Christmas card to send to a man! DH likes it. LOL

I will be back soon with something much more girlie for Christmas!

Monday 6 December 2010

Watch the Birdie

Hello Everyone

Have you seen the birds made from Designer Paper in the Stampin' Up! catalogue. (Page 89 on the UK catty - and probably with the DSP if you are not in the Europe).

One of my lovely hostesses asked me to find out how to make them so I had a try and worked on a template.

This is the bird I came up with. Not sure if it is how it was envisaged by the originator, but I like it. The DSP is a retired one, (sorry - I am only stroking my new DSP now - not actually CUTTING it! LOL)


I might have to try it with some new designer paper - when I can bear to let it near the paper trimmer! :)

Hope you like.

Friday 3 December 2010

A Card By Accident

Hello Everyone

A little break from Christmas projects today. I am going to share a card I made almost by accident while playing the the goodies from my new catalogue.

I bought Hopeful Thoughts and had been using the marker to stamp technique to see how the stem image looked in different colours. Then I started playing with my new scallop trim corner punch. I had seen a video from Stampin' Up! showing how you could make a little frame using a 2" square piece of card.

I grabbed a random piece of whisper white cardstock off my very messy desk, cut it with my trimmer and tried to create the frame. It worked beautifully, but when I turned the cardstock over, I realised I had just punched the piece I had previously stamped.

It actually looked so pretty that I made it the feature of this card.


I used lots more new toys! The Confetti background and Curly Cute are both clear mount stamps - which makes placement a breeze. No need for the stamp a ma jig here. And I got to use my wide oval punch too - just the right size for the Curvy Verses stamp.

The colours I used were Certainly Celery, Whisper White and Riding Hood Red.

Do you every have projects that happen by accident?

Tuesday 30 November 2010

Espresso Tree

Hello Everyone

Today I am sharing another Contemp Christmas project - I know I just can't stop using this stamp set!  I used the background stamp called Sanded to give some texture to the lovely dark Early Espresso cardstock.

The tree is stamped on Pink Pirouette cardstock and coloured using markers.


The sentiment comes from the Perfect Punches set - I love the way Stampin' Up! stamps fit exactly into the punches - it makes getting that professional finish SO easy.

Here is another version - this is a mini card we did as a Make and Take at my launch party. It features my favourite new colour - Cherry Cobbler.


Hope you like - back soon with a non-festive offering!

Saturday 27 November 2010

Cadbury's Christmas

Hello Everyone

This year is the first year Stampin' Up! has introduced the In Color program to us in the UK. We were excited to see our new colors - and when my upline, Amanda told me that Concord Crush was Cadbury's Purple - I had to order it at once!

For those of you outside the UK, Cadburys is IMO the BEST chocolate - mmmm - I can almost taste it now... LOL!


OK - so now what to make first? Well forward Amanda again - she is the best - we made this card at our quarterly training day. It features the Contempo Christmas bauble and the Newsprint designer series paper. We daubed the edge with Champagne shimmer paint and I love it.


Hope you like - back with more soon. Off to eat chocolate now :)

Wednesday 24 November 2010

More from the Colour Coach...

Hello Everyone

My third class card this month was also inspired by the Colour Coach. I am really enjoying trying new colour combinations.

I thought we would start making thank you cards this month - you know you are going to need them at Christmas time!


I looked to see what colours work well with my new Daffodil Delight ribbon and ink and found it would work with my favourite colour Cherry Cobbler - whoo hoo!

This card uses a stamp set that has been gathering dust in my stamp drawers, and I really don't know why because I love it! It is called Simply Said and has some lovely sentiments as well as the 2 Step Stamping flowers.

The punched Thanks sentiment on this card comes from Perfect Punches, which works perfectly with the small oval and scalloped oval punches.

I hope you like it.

Saturday 20 November 2010

Shadow Box Christmas Card

Hello Everyone

This shadow box card was inspired by the new Colour Coach that is available in the UK Stampin' Up! catalogue for the first time this year.

For those of you who don't know, the Colour Coach helps you create winning colour combinations. This project uses a selection of colours that I wouldn't have put together - but that Coach was right - I love the vibrancy of Melon Mambo, Concorde Crush and River Rock.


The design of this card is a total original, in that not having a large circle cutter, I had to be creative and use three 1 3/4" circle punches.

I stamped a snowflake background using an image from Sparkly and Bright and once again used my Contempo Christmas stamps to create the ornaments.

Love how this one turned out. My next project is also Colour Coach inspired - back with it in a couple of days.

Saturday 13 November 2010

Class Gift Candles

Hello Everyone

Today's project is the 3D item I am teaching at my November classes. Although I have done stamped candles before, this was my first time making stamped tea-lights and I was pleased with how easy they are to make. No need for wrapping in baking parchment, I just stamped on to punched circles of tissue paper and heated them onto the candles with a head gun.


We made the boxes in Early Espresso, which goes very well with the blues of Pacific Point and Baja Breeze. We used a selection of Christmas stamps including Season of Joy, Serene Snowflakes and Contempo Christmas.

Back soon with my other class projects for this month.

Wednesday 10 November 2010

Gift Card Holder

Hello Everyone

Today's project sees me back in my colour comfort zone. I just adore Cherry Cobbler and in goes so well with Very Vanilla and Crumb Cake ink.

This design was based on a project from Dawn's Stamping Studio, but I changed the stamps and colours to fit in with the goodies I had. 


The vanilla folder lifts up to hold the gift card and then slides in to the Cherry Cobbler holder. I used a tiny tag and lots of daubing around the edges of the folder. The ribbon is Very Vanilla grossgrain.

I think this is one of my favourite Christmas projects this year. Hope you like it too.

Sunday 7 November 2010

Serene Snowflakes in Melon Mambo?

Hello Everyone

Having posted my wrapping paper the other day, today I am sharing another project using Serene Snowflakes - but not a Christmas Cards.


What I like about this stamp set is that although it is snowflakes you can layer the stamps up to create a decopage effect that just looks like a pretty design - or you can go all out and use them for a Christmas project. They work so well with lots of dazzling diamonds - you can never have too much glitter. :)

Hope you like them.

Tuesday 2 November 2010

Christmas All Wrapped Up!

Hello Everyone

I confess to being very organised - my DH says I scare people with my organisation! LOL  Anyway, that is how I am and I hate to do anything last minute.

So I can tell you that my Christmas shopping is all done. :) Yay! I will just be hanging decorations and baking during December - no trailing around the shops for me.

Now there is a reason I am telling you all this - and it is to do with today's project. I always wonder what to do with all the brown paper - reams and reams of the stuff - that arrives safely packing my Stampin' Up! deliveries. It usually goes in the paper recyling bin - but I decided to try a bit of re-purposing and use it for my Christmas wrapping.


I had already made my Christmas tags, (I know scary organising again!), so I stamped the paper in matching Elegant Eggplant ink using the Serene Snowflakes stamps.


The paper is quite crumpled as you can see - but I think it gives a Shabby Chic wrapping effect that I like. So what do you do with your Stampin' Up! packing paper?

Saturday 30 October 2010

Almost Convention Time!

Hello Everyone

Well soon I will be off to Stampin' Up! convention, (the second in Europe and my first!) - I can't wait.

I have made 100 swaps - so I will have lots of projects from the talented demos to share over the next few months, along with my own work of course. :)

Well I am not going to give a peek to my swaps for convention, but today I thought I would share a swap I did for my sidelines and upline Amanda for one of her team training events. They are tiny little 1" pyramid boxes - each containing a mint!


I'm also posting a card I made a using Pick a Petal some time ago.  I stamped and hand cut the petals to form the tulip. The stem and leaves are had drawn and then I cut around the whole image to make it pop over the the designer paper.


Hope you like today's offerings - now how many days till convention???

Wednesday 27 October 2010

A non-festive Project!

Hello Everyone


Time today for a non-festive project from me! I know I have been a bit Christmas project obsessed this month! I will be tired of it by December :)

This was something I made a while ago for a workshop. It is a card with a tear-off bookmark made using the Cutter Kit from Stampin' Up! The cutter, among other tools, includes a perforating tools which is ideal for this project - or creating reply slips on invitations etc.


The bookmarks both feature critters from the Fox and Friends set and I used the crop a dile to fix the large eyelets to the top of the bookmarks.

Back soon with more :)

Sunday 24 October 2010

3D Ornament Card

Hello Everyone

This is a project I made for my new Stampin' Up! launch party. It uses Contempo Christmas for the main image and the sentiment. We now also have the co-ordinating punch - but these were hand cut as the punch hadn't arrived then!


Now I am not sure how well this photo shows the 3D-ness of this card! LOL! I stamped and cut the ornament 4 times, folded each image in half and then glued them together with tombow to make a 3D bauble.

The background is stamped in Crumb Cake ink, using the Sparkling wheel. I added a ribbon in Early Espresso. I manged to get my favourite new colour Cherry Cobbler in twice - with the bauble ink and the strip of cardstock along the top.

Thursday 21 October 2010

Festive Lists

Hello Everyone

Today's project is another from my October classes. We made a useful list book - either for Christmas planning or general shopping.


The background stamp in the So Swirly wheel - my favourite wheel so I am very happy it is still in our catalogue! This example uses the Joy at Christmas stamp from Perfect Punches, the bauble from Contempo Christmas layered over Fine Flourish.


Inside I we covered a plain notebook and added wide black and white striped ribbon to create a pen loop.

In case my ladies preferred a non-festive version, I had some alternative stamps available to decorate the notebooks.

Hope you like today's offering. Back in a couple of days with another.

Monday 18 October 2010

Vintage Christmas Card

Hello Everyone

Today's post is one of my class projects for October - a vintage Christmas card. It uses the masking technique and the fir cone stamp from Lovely as a Tree to create the wreath.


I distressed the edges of the layers of cardstock and daubed with Soft Suede ink. The edge of the main card I daubed over the top with Champagne Shimmer Paint, to add some subtle sparkle.

The background is stamped with the ivy image from Vintage Vogue and the sentiment was stamped over the top in Versamark ink and heat embossed in gold. I love the addition of the tiny tag too!

I did two more examples for my class ladies to see. The first is the modern variation in Elegant Eggplant and the second is my traditional sample.


I think the purple one is my favourite - I'd love to know which one you like best?

Friday 15 October 2010

Almost forgot the Robin!

Hello Everyone

I just realised that although I shared the other September class projects, I forgot to show you this little robin card we made last month.

It was very quick and easy - which was just as well because the other projects took a while!


It is made using the Soft Holly wheel, which we stamped in Old Olive on the Very Vanilla cardstock. We inked a few of the berries using the Real Red marker. (I found that it looked best with just a few berries picked out in red - when I tried doing them all it was too busy).

We daubed around the edge of the vanilla in Soft Suede ink and then punched out the bird using the Two Step Bird Punch in soft suede. We daubed the bird too. We then punched the wing shape in red and trimmed it to create the red breast for the robin. The sentiment comes from Season of Joy.

This was a fun and fast card to make - I hope you like it. Back soon with some more class projects.

Tuesday 12 October 2010

How cute are these?

Hello Everyone

Today I am sharing such a cute project. These handbags, (purses for those reading in the U.S.), are from a template by Becki Roberts. I have made some changes including the tab closures with a bit of bling in the form of a diamonte brad.


They are made in Bashful Blue cardstock, with the images, from Greenhouse Garden, stamped in Baja Breeze. The sentiment is from Perfect Punches and attached to the bags with Early Espresso ribbon.


I haven't got any co-ordinating buttons for this project, so I made some with punched circles of Baja Breeze cardstock, coated in Crystal Effects.

I love my handbags - hope you do too!

Saturday 9 October 2010

CASEing the Lillies

Hello Everyone

Today I am giving a thank you to two very talented Stampin' Up! demos across the water. The first is Sharri who first came up with this design - how talented is she? Go and check out her amazing creations.

The second is Valita who, with Sharri's permission, made a video showing how to make these flowers.

I first made these lillies to decorate my apron for my summer garden party and after many requests promised to share the technique with my sideline demos at our quarterly training. I also showed them to my lovely class ladies and customers at the new catalogue launch party I held recently.

Here are the ones made from Sharri and Valita's design:


With all the fabulous new colours in the new catalogue, I wanted to make something a bit more tropical and exotic - so I went with Baja Breeze as my base colour for my demonstrations.


I used Wild Wasabi ink for the 'veins' (is that what you call them on a flower?), and managed to find a place for Cherry Cobbler with the small markings on the petals.

The stamens, (my botany skills are being put to the test here LOL), are tipped with turquoise glitter from the Fine Cosmo glitter collection from Stampin' Up!

I won't give you any further instruction as Valita's video does that far better than I can. (I will just say that we only just got the wide oval punch in the UK, so these samples were made with the large oval - I think they look even better with the wide one - which will be arriving in my craft room soon! LOL)

Many thanks to Sharri from Canada and Valita from Australia - a real around the world Stampin' Up!project.

Wednesday 6 October 2010

Lovely as a Branch!

Hello Everyone

I have seen various versions of today's card out in blog-land. I have no idea which clever person first thought it up - but I am very grateful to them.

Once I started playing with the bauble from Contempo Christmas, I realised I wanted to 'hang' it from something, but didn't have a suitable branch stamp - until I saw this idea.


The branches are made with the fir tree from the Lovely as a Tree stamp set - don't they work well?

I used the Cherry Cobbler cardstock again, which I love so much, and daubed the edges of the card with Early Espresso ink to give a slightly vintage look.

The bauble is stamped in Versamark ink and embossed with silver embossing powder and the 'string' it hangs from was drawn with a Versamark pen.

I finished the card by embossing the greeting in black and adding a bow made with Old Olive satin ribbon.

Hope you like :)

Sunday 3 October 2010

Pretty in Blue

Hello Everyone

Today I am showing off some more of our new colours - the blues. We have a beautiful new range to choose from and trying to decide which one to make as the background of this card left me undecided - so I decided to make all three!
The blues are Pacific Point top left, Baja Breeze top right and Marina Mist at the bottom. And no I still can't decide which I prefer!


I used the tree image from Contempo Christmas, layered up on Whisper White and Basic Black cardstock and with the soft wide black and white ribbon at the side.

The background is from Baroque Motifs - and I am so glad we now have adhesive pearls in the new catalogue - perfect to add a little embellishment to finish this project. You can see all the lovely goodies in the new catalogue by clicking on the link at the top of this page.

So tell me - which blue do you like best?

Friday 1 October 2010

It's HERE! New Stampin' Up! Catalogue & Launch Party

Hello Everyone

It's my favourite time of the Stampin' Up! year - new catalogue time! You can see it online or get your own copy by clicking on the link at the top of this blog.

We have so many new things to be excited about too - a colour renovation that brings some amazing new colours to the Stampin' Up! range - and new designer papers and ribbons to match the inks and cardstock.

I am going to share a number of projects with you over the next few days - be prepared to see lots in my new favourite colour - Cherry Cobbler! Today I am sharing a fabulous new Christmas stamp set called Contempo Christmas. I am really pleased we are getting a matching punch for the bauble stamp - but as mine was only ordered today these have been hand cut. :)
Isn't that Cherry Cobbler the best? I have realised it is the feature colour in my living room, (with cream), and was also my bridesmaids dress colour - no wonder I love it!

This card was done by stamping the image first in Cherry cobbler ink, then masking those images and stamping in Versamark ink and heat embossing in gold. Finally I stamped the bauble on Very Vanilla cardstock, and embossed with clear embossing powder. I cut them out and applied using dimensionals.

Both sentiments come from the same stamp set - embossed again in gold.

I am also sharing a few pics of my launch party set up. I did it in a local hall and 22 lovely ladies came along. We had a great evening, with two make and takes, a try-me table for our new clear mount stamps, a tabbing table - so we could put page tabs on our shiney new catalogues and lots of laughter and cake of course.


I want to thank Hayley, Helen, Jane and all the other girls  for the swaps they did for me. And not forgetting my upline Amanda, who did a fabulous new catalogue training day. I couldn't have done this without you!

My lovely sister Maria helped me and worked so hard. I am really grateful for her help. She also took these pics after we had set up - but we were so busy during the party we forgot to take any more! LOL


Happy new Stampin' Up! year and I will be back in a couple of days with more projects.

Thursday 30 September 2010

Punch Elephants


Hello Everyone
...
Today's project was a special request from Elaine, who comes to my second Tuesday class. (Hi Elaine *waves*)
...
At her sister's workshop she set me a challenge. She wanted to know how to make a punch art elephant.
...
So home to my punch rack and I started to experiment. The butterfly punch and heart to heart punch works perfectly for the ears.

The trunks are made from the large heart, (mummy elephant) and the largest of the heart to heart hearts, (baby elephant).

...

My best success was the tail, which is the leaf from the 2 step bird punch, snipped above the first leaf and the leaf feathered to create the tail.

...

I finished the card with the tree stamp from Forest Friends, the leaf from Lovely as a Tree and more leaf punchies.

...

I love them - and my lovely upline Amanda thought they were so cute she asked me to teach them at her quarterly team training day. :)

...

Hope you like!

Tuesday 28 September 2010

Circle Circus in Red and Black

Hello Everyone

...

I don't own this stamp set - but I got to stamp with it at a shoebox swap. Michelle Gattrell designed this card - I always like her designs and enjoyed making this one.

They are great colours aren't they? Just Real Red, Black and White - I must use them again soon!

Saturday 25 September 2010

Bellas Blooms Gift Bag

Hello Everyone,

...
I am sharing such a pretty project with you today. This bag is made using a retired and much missed designer paper from Stampin' Up! Still not much longer till the new catalogue is out, with lots of new papers to tempt us all.
...
This bag in a box is a design that has been around forever, but I love it and lots of my ladies had never seen it before.


We used the pretty Bellas Bloom and the marker to stamp technique to create the decoration and sentiment.
...
Hope you like...now how many days to the new catalogue ??? :D