I feel so loved being a Stampin' Up! demonstrator. Just look at all these beautiful cards and packaging my lovely ladies and team gave me at Christmas - a whole dresser full of gorgeousness.
Thank you so much to each and every one of you who took the time out of your busy lives to make these goodies for me. I really appreciate it.
Happy New Year everyone - looking forward to seeing you all soon.
Wishing all my blog readers a very Merry Christmas.
No video today - but a thank you card, to say thank you for visiting me throughout the year. I will be back on new years eve with another video tutorial.
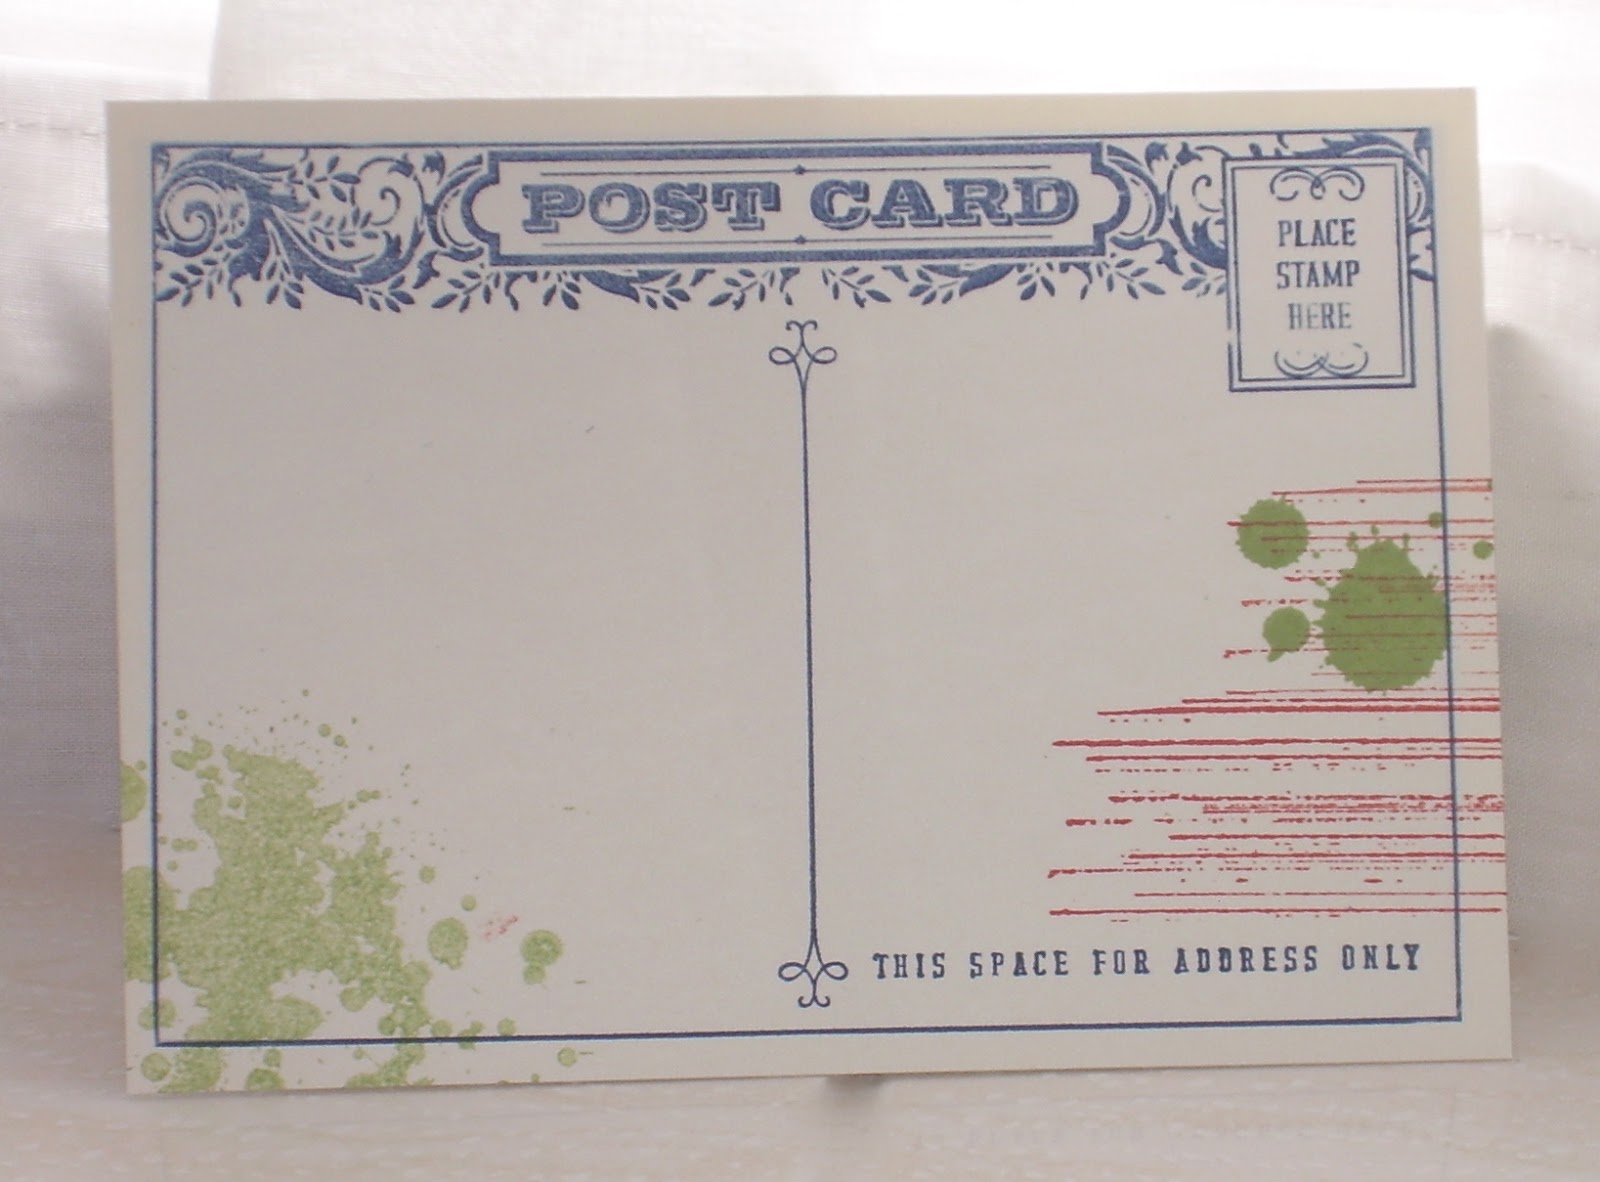
Today's video features stamping with bleach - and some of the effects you can achieve….
Hope you liked today's video. I will be posting over Christmas, and will be back with more videos after the holidays. Have a wonderful festive celebration!
Today I am sharing a tall card made with the Northern Flurry Embossing folder. I used the Wishing You stamp set on the outside and the inside. That little gift image is part of the set - punched out with a circle punch.
Love the luxury of the Cherry Cobbler ribbon. Inside I did a panel of Cherry Cobbler and Very Vanilla to stamp the greeting and gifts upon.
Well it is December - so time for a Ho Ho Ho from a certain person! This stamp set is called Santa's List and I love the greeting - I sing along every time I see it...
My lovely upline Amanda designed this card - we made it at a recent team training...
On the front and inside I used the Pretty Print textured embossing folder. People have asked me what it says - but it doesn't say anything...it is just the look of text. So useful all year round!
Just a quick project today. This is an easy gift box, you can stamp on the outside, (as I did with the stars), add a bow and greeting and your box is ready to go.
I stamped the bow with the Festive Flurry stamp set in Smoky Slate and finished with a matching brad made using a Candy Dot.
Something I can fill with treats and give as a quick Christmas gift I think!
Well I am just back from an AMAZING European Stampin' Up! Convention. My team is called the Dazzling Dreamers and 10 of us went along and had a ton of fun and learned loads of fabulous things to share with you. In the photo you can see Sara, Nichola, Nina A, Tracey W, Naomi, Tracy L, Me, Carolyn, Leigh-Anne and Nina C.
Now the MOST exciting thing for our team at convention is that we WON THE CONVENTION VIDEO COMPETITION! We are so excited about it - so today I have two videos to share. Scroll down to see a cute Santa project - and click right below to watch our very hammed-up contest winning video! (BTW, for my non-European blog visitors, 2007-8 was the very first catalogue released in Europe when the market opened here).
Did you spot some of my lovely girls from the photo above - and of course my fabulous upline Amanda Fowler?
I hope the video made you laugh and smile - and maybe it made you think about your journey with Stampin' Up!? I am beyond grateful to Amanda and my team and everyone at Stampin' Up! for enabling me to share all that I love with my friends, customers, blog readers and YOU!
If you are a Stampin' Up! customer and you think it is time to start your journey as a demonstrator - why not join the Dazzling Dreamers? You could be in next year's team photo from Stampin' Up! Convention which is going to be in Brussels. Contact me and we can have a chat about your crafting business hopes and dreams.
So - after that excitement - down to business! Today's video was inspired by a project by France Martin - thank you Frenchie for the fabby idea. Enjoy the video.
Today I am sharing a project using the Festive Flurry stamp set and matching framelit dies. I first adhered a strip of Winter Frost DSP to a piece of Naturals White cardstock. The card was just a little smaller than base card I was using. I then cut out a snowflake shape.
I stamped and cut two smaller snowflakes and layered them up using dimensionals. The greeting stamp comes from the Wishing You stamp set. I finished the outside with a rhinestone.
I didn't waste that snowflake I cut from the card front... I stamped the greeting from the same stamp set and it became the inside of the card.
Have you see the Festive Flurry ornaments in the Autumn/Winter catalogue. I loved them, but didn't know how they had been put together. I had a play and came up with this video to show you how I made mine.
A close up for you...
So - are you off to make your own decorations now? :)
I promised last week to show you how we didn't waste the middle of a mat made of Silver Foil sheet. Here is the project.
This little tea light decoration was made by using Coaster Board to cut the base using the Festive Flurry Framelit dies. Did you know our new Coaster Board can be cut with framelits?
The middle of that Silver Foil mat was cut using the next snowflake size down in the framelit set.
If you want to see how to stamp the top of the tea light - check my videos. There is one showing stamped tealights in a Window Gift box.
Today I am sharing another of my special Christmas card projects. More silver embossing and a fancy fold on this one.
We used the Wonderful Wreath stamp set which is set of beautifully agains the Bermuda Bay background. We layered up on the fabby silver foil sheet from the Autumn/Winter catalogue, (and we didn't waste the middle bit that you can't see - check back next week and I will show you where we used it).
You can see the fancy fold element better on this picture. We used the Winter Frost DSP for the panels which gives lots of silvery shine. The greeting comes from Teeny Tiny Wishes.
So excited to be sharing this video with you today! It is the new Envelope Punch Board from Stampin' Up! You are going to love this new product which is only £17.95!
As well as making envelopes it makes boxes, file folder cards and tabs and so much more. Just wait until you see with the videos and classes I have coming up.
But for now - this is how it is meant to be used.
I hope you enjoyed today's video. If you would like to order a new Envelope Punch Board, please contact me and I will be delighted to help.
Today's project is one of the cards we made at my recent special classes. It features the lovely Festive Flurry stamp set.
We made a large card using an A4 sheet of Smoky Slate cardstock and cut the Window Frames layers to reflect the colours used in the stamping, (Island Indigo and Coastal Cabana).
We went to down on this one with Silver Embossing, Iridescent Ice Embossing, Silver Glimmer paper, Silver Ribbon and the beautiful Winter Frost DSP.
Today's video is inspired by a project I was given by one of my lovely downline. (Thank you Tracey!) I have been sharing this at some recent workshops and everyone just lovely this little sweetie!
So will you be bringing angels into your life today?
Today I am sharing a project I learned how to make from a lovely fellow demo called Hazel Benn. I just loved the cute little crackers - and they were SO easy to create.
I couldn't wait to teach my lovely class ladies. They are made from Whisper White cardstock decorated with Seasons of Style DSP.
I finished them with the Christmas greeting from 'That's the Ticket' and the fabulous Silver ribbon from the Autumn/Winter catalogue.
If you are local to Hampshire and want to join me for a class, why not contact me? I would love to hear from you.
STOP PRESS.......25 stamp sets at a 25% discount. 7 days only - order before 28th October or miss out. Click shop now to browse the list. There are some great ones there....if they are on your wish list order quickly either online or contact me.
I am so excited to be sharing a video about a brand new tool from Stampin' Up! It is called the Label Card Thinlet die - but I am calling it the fantastic flip card set!
As you will see in the video - it makes flip cards, but with all the accessories you can make so much more. Contact me today if you want to order yours. (It could make a great Christmas gift for a crafty friend - or for you!!!)
I hope you enjoyed today's video. If you are coming to my upcoming classes and workshops you will see this for real very soon!
My lovely customer and friend Clare sent this picture over after she and her friends and family spent an evening making Stationery Trunks made with my tutorial.
I just had to share - don't they look fabulous?!
They also did some stamped candles that we did in our special Christmas class.
Today's project is a little gift card holder. I have used lots of goodies from the Autumn/Winter catalogue from Stampin' Up!
The greeting and inside stamping are done with the stamp set Wishing You. The little bows are pre-tied on to the clips, making the closure really simple.
When you open the holder you find a space for a gift card - or in my case you find a Disney room key card...couldn't find a gift card for the picture. LOL
You can see how the simple fold works in the photo below.
I hope you like this quick and easy gift card holder.
Today I am sharing a video of a card I made up as I went along. This is really the way I create...changing my mind as I go. Like many of us, a mistake becomes a happy accident, or an embellishment opportunity!
When you have watched the video, scroll down to the bottom of this post and see the mess I was working in...then you will understand why I kept losing things! LOL
Today I am sharing two ideas for using the Tag a Bag gift Bags from Stampin' Up! As you may know I LOVE the gift boxes, (also on page 158 of the big catalogue), but I had some questions about how to use the bags - and here is what I came up with...
The first idea is actually to snip off the bottom of the bag, snip up in four corners, fold in and create a bag that stands up. I have decorated with the lovely Chalk Talk stamp set cut with the matching framelits.
My second project is my favourite. By simply placing the paper bag inside one of our large cello bags, you get a luxury look! Again I finished with a Chalk Talk label, Natural Trim Ribbon and Linen Thread.
There are lots of other ways of using these cute bags - will you be adding them to your wish list? :)
I had some giveaway projects on display for my team recently including a Hexagon Gift Box that I made some time ago. My lovely downline Sara picked up the box and was trying to figure out how to make it. You can see the box below on the left.
So I thought it was time to do a festive re-design and share it at my September classes. This box is made using the Mini Milk Carton Bigz die from Stampin' Up!
For the festive one I used the Season of Style DSP and Merry Minis Punch Pack, (in case you can't see this in your catalogue, these and other festive goodies are carried over from last year - ask me or your demo for details).
I also used the Christmas greeting from That's the Ticket and finished with the truly gorgeous Silver Ribbon from the new Autumn/Winter catalogue.