Monday 30 April 2012

Summer Mini Catalogue

Hello Everyone    
Today we are celebrating at Stampin' Up! UK. We are launching our first Summer Mini Catalogue and wow it is fabulous.

There are so many things I want to share with you, it is hard to know where to start. For those of you booking and attending workshops over the next few months - you are in for a treat :)

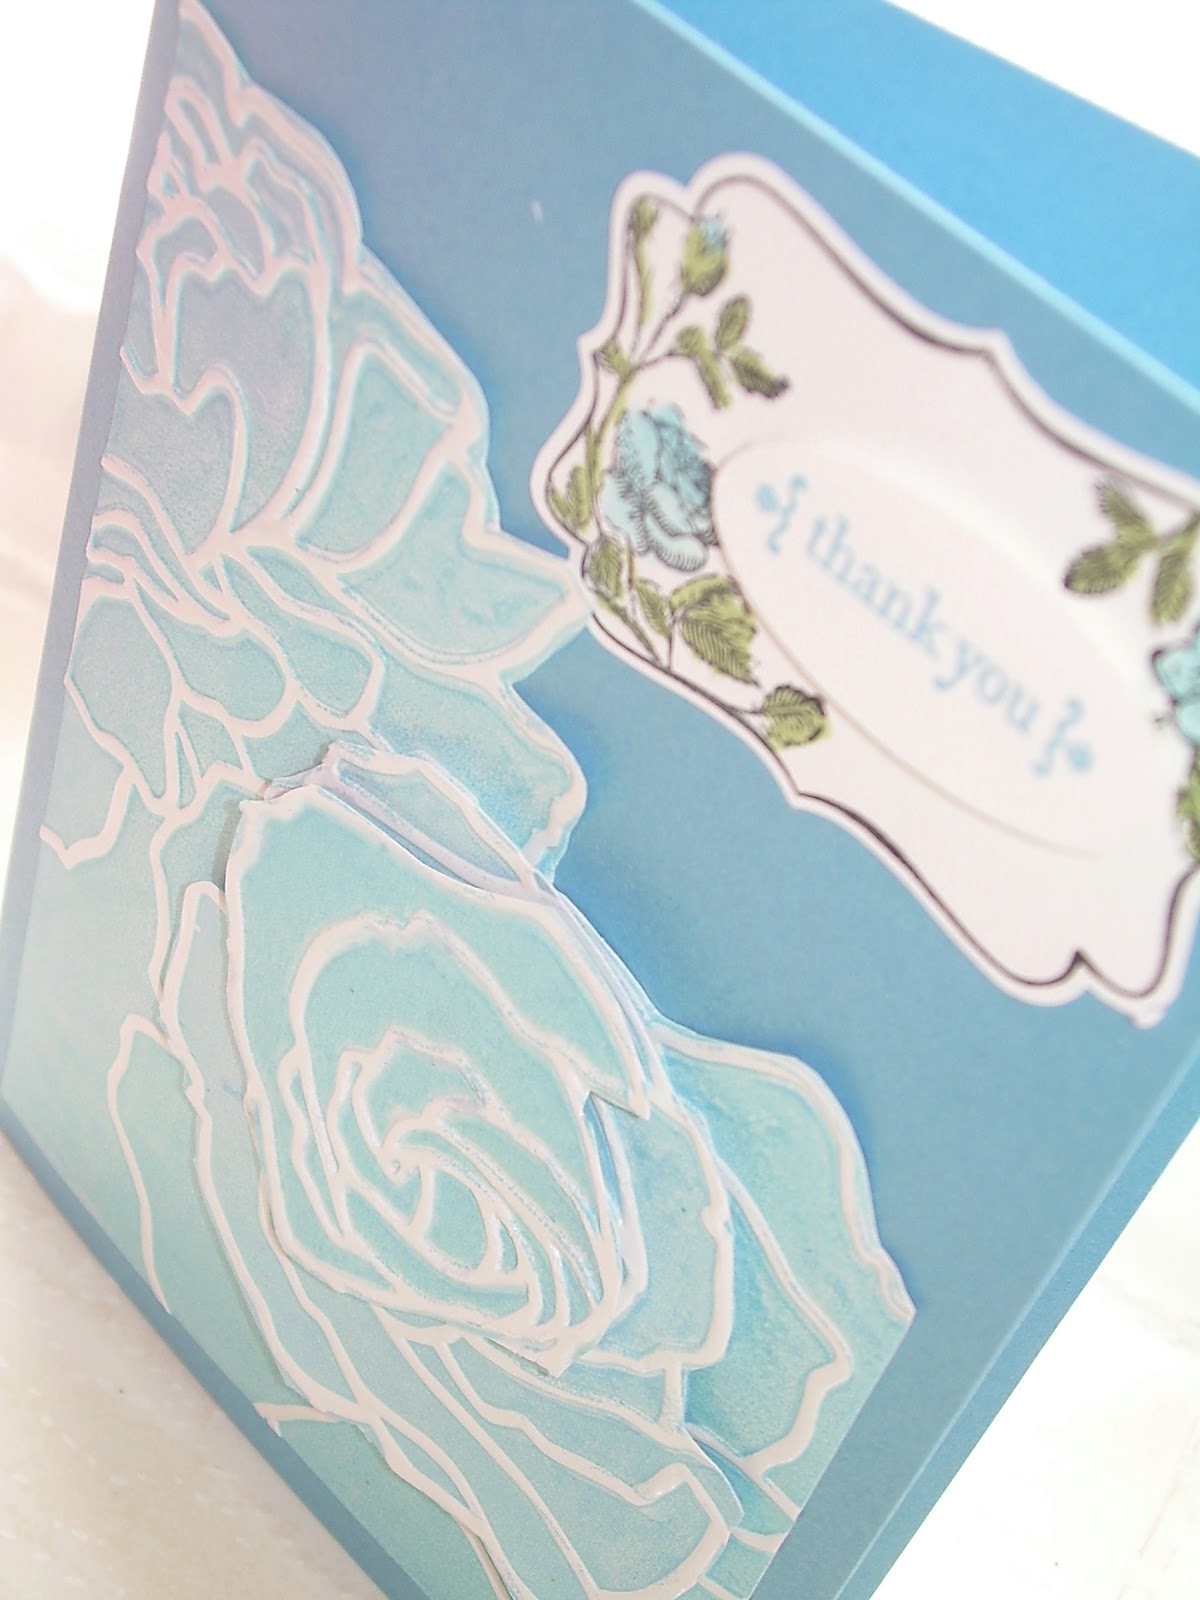
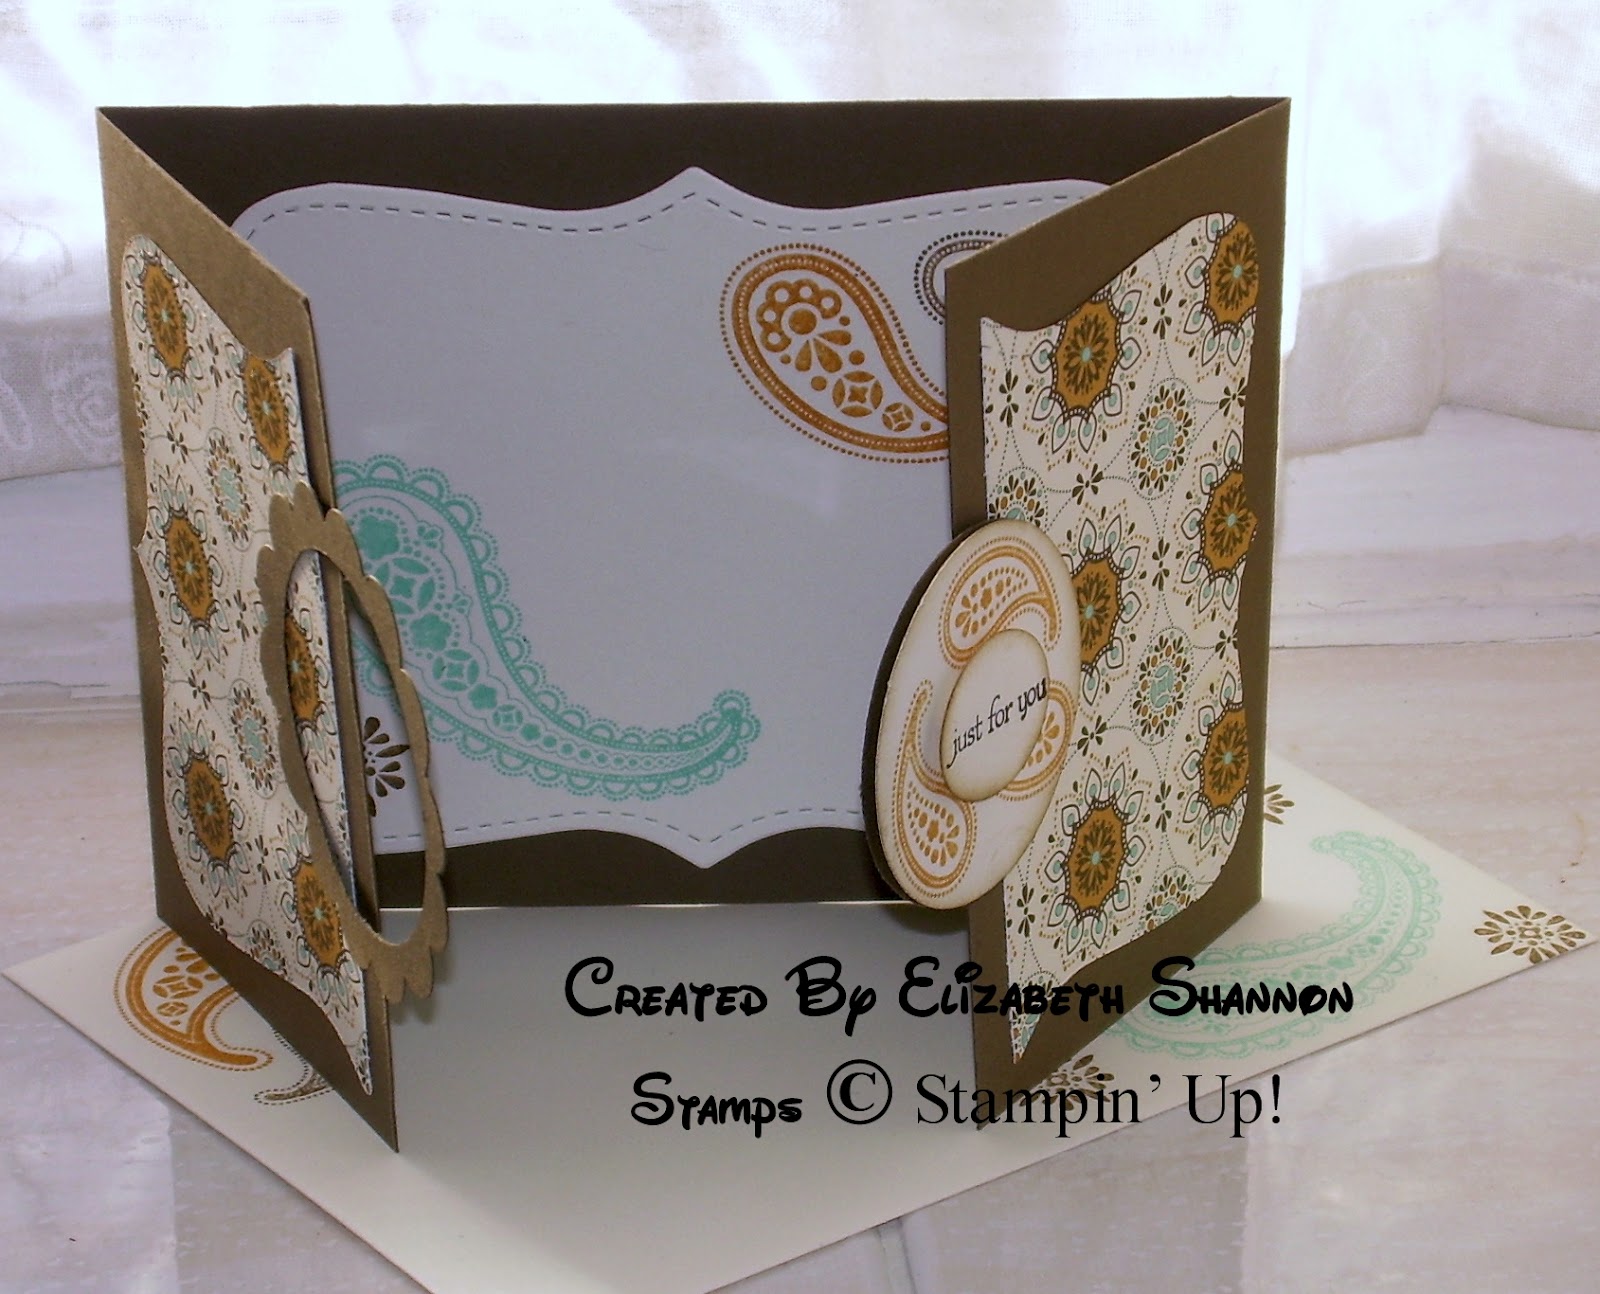
I am starting by showing a card featuring a new stamp set called Apothecary Labels - which works perfectly with our new Framelets dies! My lovely Big Shot ladies are just going to love the framelets! And talking of the big shot - do you see the hearts at the bottom - another Big Shot folder called Adorning Accents.


Now if you are coming to my upcoming classes, Customer Thank You Party, or a workshop you will see the new mini catalogue - but if you just can't wait you can see it online here...

Back soon with more fabby projects.
Love Elizabeth X

Faith in Nature Card

Hello Everyone

Today I am sharing a quick card that was our final card at April classes. The background was stamped using a clear block, inked up and applied direct to the cardstock. Over the top we stamped an image from one of our hostess sets, Faith in Nature.

We also used the Lace Ribbon Border punch to create the edge detail on the card and finished with some co-ordinating ribbon.


I hope you like today quick card.

 Love Elizabeth X

Friday 27 April 2012

Faux Tile Technique

Hello Everyone

Today I am sharing a project I taught at our April classes. We do a different technique each month and this one is the Faux Tile technique.

We started by decorating the background card, using the Very Vintage wheel and Rose Red ink on the Rose Red card - we also did some decoration on the envelope and inside of the card too.

Then using Whisper White card stock we scored inch squares, then brayered gently using Pink Pirouette ink. Next we stamped multiple images using Clearly For You making sure they went over the tile edges.


We finished with the Dotted Scallop Ribbon Border punch and the Eyelet Border punch and layered up a greeting on the matching Pool Party and Island Indigo cardstock.

The butterfly, greeting and background to the greeting also come from Clearly For You. We also used some beautiful Island Indigo ribbon and a couple of Basic Pearls.

Why not have a go with this technique next time you do some crafting?

Love Elizabeth X

Tuesday 24 April 2012

Fabric Covered Pillow Box

Hello Everyone

Today's project is a pretty fabric covered pillow box. We made similar ones in class this month and in all the different fabrics they looked just gorgeous.

They were very simple to make using the Multipurpose Adhesive Sheets from Stampin' Up! All we did was to stick one side of the adhesive sheet to a square of cardstock, then laid the fabric on to the other side of the adhesive sheet.

We then ran all three layers through the Big Shot using the Pillow Box die - so easy!

This particular one was decorated using the Flower Burst Embosslit. I ran it through the Big Shot twice, once in Whisper White and once in Wisteria Wonder. I cut out the central portion of the Wisteria flower and daubed around the edges of both with matching Wisteria Wonder ink.


I finished with white Organza ribbon, three Basic Pearls and the 'friends' sentiment from Tiny Tags. I hope you like it.

Love Elizabeth X

Friday 20 April 2012

Brayered Embossed Technique

Hello Everyone

The cards for today both use a brayered dry embossed technique. To create these cards, I first brayered the inside of the Manhatten Flower Embossing Folder with a bold ink - Melon Mambo for the first card. I took a piece of Glossy White cardstock and after running it through the Big Shot, I wiped any excess ink from the embossed portion of the card.

I then cut out the flowers, (I did an extra one and created some further dimension too). This card is finished with the beautiful white Organza Ribbon.


For this second card I used Marina Mist as the colour to brayer. I made the rose using three layers of the Manhatten Flower image and the greeting is from the Four Frames stamp set, punched with the matching Decorative Label punch.


Why not have a go with this simple but effective technique.

Love Elizabeth X

Monday 16 April 2012

Clearly Thank You

Hello Everyone

Today I am sharing my most recent thank you cards made with the beautiful Clearly For You stamp set. I make a little card for everyone who places a Stampin' Up! order with me. I really enjoyed making this design.


The stamp set has the beautiful rectangular background image and lots of delicate images to use with it. You can see it below in close up. I chose the blackberry and the butterfly for the card and the three little birds and the bird in a flourish frame for the envelope. The colour choices are Wisteria Wonder, Elegant Eggplant and Lucky Limeade.


Hope you like today's projects.

Love Elizabeth X

Thursday 12 April 2012

Spiced Paisley Card

Hello Everyone

This card was one we did at our classes last month, somehow I forgot to show it - but I love the closure so much I am bringing it to you late. :)

We used the Spiced Paisley stamp set and co-ordinating Spice Cake designer paper to create this fancy fold card. The closure is made with the Large Scallop Circle punch and the 13/4" Circle punch.


You can see how it works with the open view...


As well as stamping the envelopes, we have been decorating the inside of some of our cards at class this year. It gives such a lovely finish doesn't it?


Love Elizabeth X

Sunday 8 April 2012

Simply Adorned

Hello Everyone

I have been having so much fun with the Simply Adorned jewellery from Stampin' Up!. We made some inserts and a box to keep them in at team training in January. We stamped the box with the Spiced Paisley stamps and Amanda designed a clever way to create the inside compartments.

I added some decoration to the box using the Charming stamp set, stamped some tissue paper to go in the compartments and just kept making those pendant inserts! I now have them to go with every outfit and every occasion and they are SO much fun to create and wear.

Here is the outside of my box....


...and inside....


Thank you Amanda for your great design and thank you Stampin' Up! for such a fun thing to stamp!

 Love Elizabeth X

Wednesday 4 April 2012

Welcome Orlaith

Hello Everyone

One of my lovely downline's Carolyn had a new arrival a few weeks ago. Little Orlaith, (a Celtic name pronounced Or-la), came into the world and I made a card and gift to welcome her.

For the gift bag, I stamped tissue paper with the Delicate Doilies stamp set and put it inside a Large Cello Bag. I made a topper with lots of punches. It was lovely to personalise her little gift by stamping her name.

I am sure you have seen my dresser cards before, but I think they are SO cute for baby cards I had to make another. Luckily I keep templates for all my class projects so a little searching had me measuring, cutting and folding a matching card.


The Welcome Baby sentiment comes from Petite Pairs, and the envelope is stamped with images from Tiny Tags.

Hope you like it!

Love Elizabeth X

Sunday 1 April 2012

Cupcake Gift Card Holder...& New Class Room

Hello Everyone

Today I have a few photos to show you. This is not Elizabeth's Craft Room - this is Elizabeth's Classroom! This is the room in my home, (formerly known as our dining room), that I have converted to a proper Stampin' Up! classroom for my classes and workshops. Thanks to my fabulous DH Michael, who has let Stampin' Up! take over another room in our home - bless his heart!

So are you ready to see the photos...


So what have I been teaching in my classroom? This is a project I have been making at my recent workshops. It is a sweet little gift card holder - with the emphasis on the sweet. :) I am back on the Weight-Watchers band wagon, so these are the only cupcakes I am allowed at the moment. LOL

I started with two Scallop Squares cut with the big shot die and then added a layer of Beau Chateau designer paper. Next came a large scallop circle punched in white and daubede around the edge and finally the cupcake.

We now have the Create a Cupcake stamp set and matching punch and I love them!


The closure is made with Victoria Crochet Trim, and inside I cut another piece of designer paper from the Beau Chateau pack using the Scallop Envelope die - this creates the place to pop your gift card.


The sentiment, (from Create a Cupcake), reads "It's not how many candles you blow out, but how many cupcakes you get!" My thoughts entirely.

Love Elizabeth X